Overview
By default, Omega, Ultra, and MaxColor Series Encoders request the maximum supported audio and video formats available for the connected source device. While this behavior is suitable for most installations, certain scenarios may require alternative configurations, such as specific resolutions, color spaces, HDR modes, or audio formats. In these cases, modifying the Encoder EDID may be required.
If a source device does not output the expected video or audio format, first verify that all Encoders and Decoders are running the latest firmware versions. Firmware updates frequently resolve compatibility and EDID-related issues without requiring manual EDID modification.
Note: EDID changes affect only the Encoder to which they are applied. Modifying an Encoder EDID does not change the EDID configuration of other Encoders in the system.
Firmware Requirements
This article applies to the following devices and firmware versions:
Omega Series: justOS B2.1.0 or later
Ultra Series: justOS B2.1.0 or later
MaxColor Series: MAX v3.7.4 or later
Important: Devices running earlier firmware versions may not support all EDID management features described in this article.
Devices using legacy Ax.x.x firmware should instead follow How to Modify the EDID for 2G Series Encoders.
EDID Management Methods
There are three supported methods for modifying EDID on an Encoder:
- Built-In EDID – Select from preloaded EDID profiles
- Capture EDID – Copy the EDID from a connected display
- Custom EDID – Manually apply a specific EDID hex string
The Default EDID can be restored at any time through the Encoder webUI.
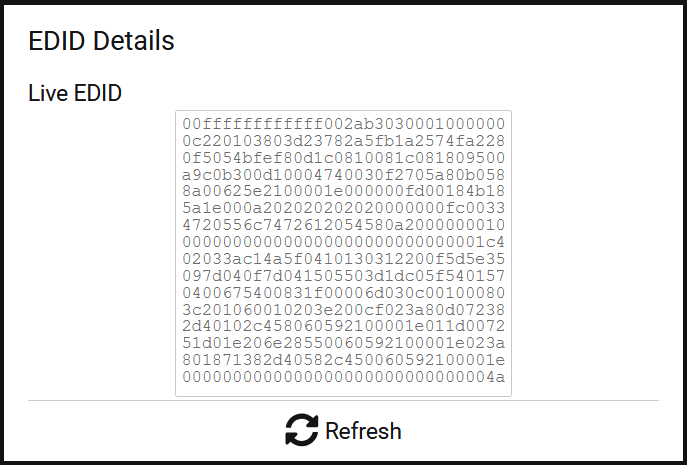
View Active EDID
The currently active EDID being presented to the source device can be viewed using the webUI:
- Log into the Encoder webUI
- Navigate to the Video tab and expand EDID Details
- The active EDID is displayed as a hexadecimal string
- After making changes, select Refresh to update the displayed value

Built-In EDID
Omega, Ultra, and MaxColor Series Encoders include built-in EDID profiles for common video and audio configurations. Available options depend on the Encoder model and firmware version.
To apply a Built-In EDID:
- Log into the Encoder webUI
- Navigate to the Video tab and locate EDID Settings
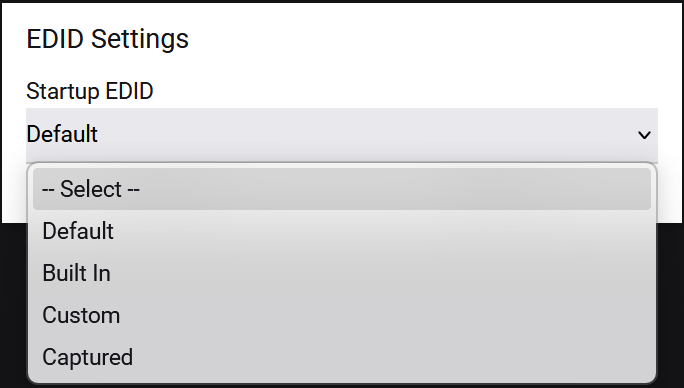
- Select one of the following EDID modes:
- Default – Maximum capabilities of the Encoder (model-specific)
- Built-In EDID – Manually define supported video and audio formats
- Custom EDID – Apply a user-defined EDID string
- Capture EDID – Copy EDID from a connected display
- Select Built-In
- Configure the maximum Video Resolution and Audio Format:
- Stereo – LPCM 2-channel, 48 kHz, 24-bit
- Multichannel – 5.1 DD/DTS, 7.1 Dolby Atmos/DTS/DTS-HD, LPCM 8-channel 48 kHz 24-bit
- Select Apply to activate the EDID
The Encoder updates immediately; however, some source devices may require a power cycle to recognize the new EDID.

Capture EDID
Capture EDID copies the EDID from a display connected to a Decoder and applies it to the actively viewed Encoder. This allows the source device to detect the capabilities of the display as if it were directly connected.
To capture an EDID:
- Access the Decoder webUI connected to the target display
- Navigate to Video Settings → EDID Settings
- Select Capture

The EDID is applied immediately, though the source device may require a power cycle to acknowledge the change.
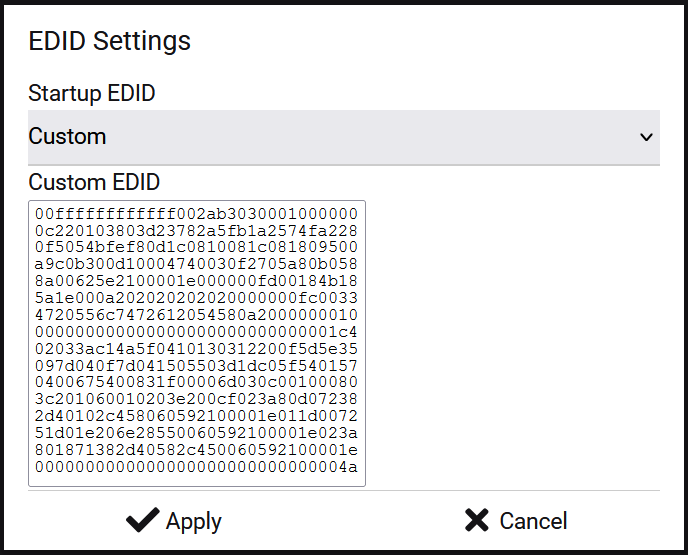
Custom EDID
Custom EDID allows direct entry of a hexadecimal EDID string. The string must be continuous, with no spaces or line breaks. This method is recommended when precise control over video and audio capabilities is required.
Example: The following EDID requests 4K HDR video with Dolby Digital 5.1 audio:
00FFFFFFFFFFFF002AB3003000000000141E010380A05A782AEE91A3544C99260F505421080081C08100818090409500B30001000101023A801871382D40582C450040846300001E000000100000000000000000000000000000000000FD00183C1E5A1E000A202020202020000000FC00484449502D313038302D322E3001DE02032DB14A901F20051404131E030123090404830100006A030C001000B83C211000E2000FE305C000E3060501023A801871382D40582C450040846300001E00000000000000000000000000000000000000000000000000000000000000000000000000000000000000000000000000000000000000000000000000000000CCTo apply a Custom EDID:
- Log into the Encoder webUI
- Navigate to the Video tab and locate EDID Settings
- Under Startup EDID, select Custom
- Paste the EDID string into the Custom EDID field
- Select Apply
- Power cycle the source device if required
- (Optional) Verify the applied EDID under EDID Details and select Refresh