


Add Devices On-site with AMP Standardized Configuration
Overview
Use AMP to add new Encoders and Decoders to an established Standardized Configuration system while on-site. AMP retrieves the system information through an active device, identifies available expansion ports, and configures each new device for the port you select.
This procedure covers Omega Series, Ultra Series, and MaxColor Series systems, along with supported 2G Series systems operating in AMP 2G Legacy Mode. For an Alternate Configuration system, follow Add New Devices On-site to an Established System with AMP Alternate Configuration.
Expansion ports must already be configured: Add Devices uses unused Encoder or Decoder ports reserved in the existing switch configuration. An empty Data Network port is not an available Encoder or Decoder port.
Walkthrough
Before You Begin
- Download and install AMP. Review the known issues linked on the download page before servicing the system.
- Confirm that the new device models are compatible with the established system's series and operating mode.
- Obtain the IP address of an active Encoder or Decoder in the established system.
- Have a Windows PC with a wired Ethernet adapter, network cabling, and suitable PoE or supported power supplies for the new devices.
- Identify Data Network ports where the new devices can communicate with the PC during discovery.
- Keep the existing system report available to check assignments and final switchport connections.
For a system containing 2G Series devices, review 2G Legacy Mode compatibility and limitations before selecting hardware. Only compatible models can join that system, and compatible Omega Series and Ultra Series devices operate within its 1080p capability limit.
The new devices use two different connections during this procedure:
| Stage | Device connection | Purpose |
|---|---|---|
| Discovery and configuration | A Data Network port on the same local network as the PC | Allows AMP to discover the device and apply its assigned settings. |
| Final installation | The exact Encoder or Decoder port paired with the device in AMP | Places the configured device in its assigned position in the system. |
Standardized Configuration assigns different functions to Encoder, Decoder, and Data Network ports. For port allocation and settings that must remain unchanged, see Switch Configuration Guidelines for AMP Standardized Systems.
Start the On-Site Workflow
- Connect the PC to the site Data Network using its wired Ethernet adapter.
- Open AMP and select Build & Expand for Standardized Configuration.
- Select Add Devices, then On-Site.
- Enter the IP address of an active Encoder or Decoder in the established system.
- Select the PC's wired Network Adapter, then click Go!.
- Wait while AMP retrieves the system information and identifies available expansion ports.
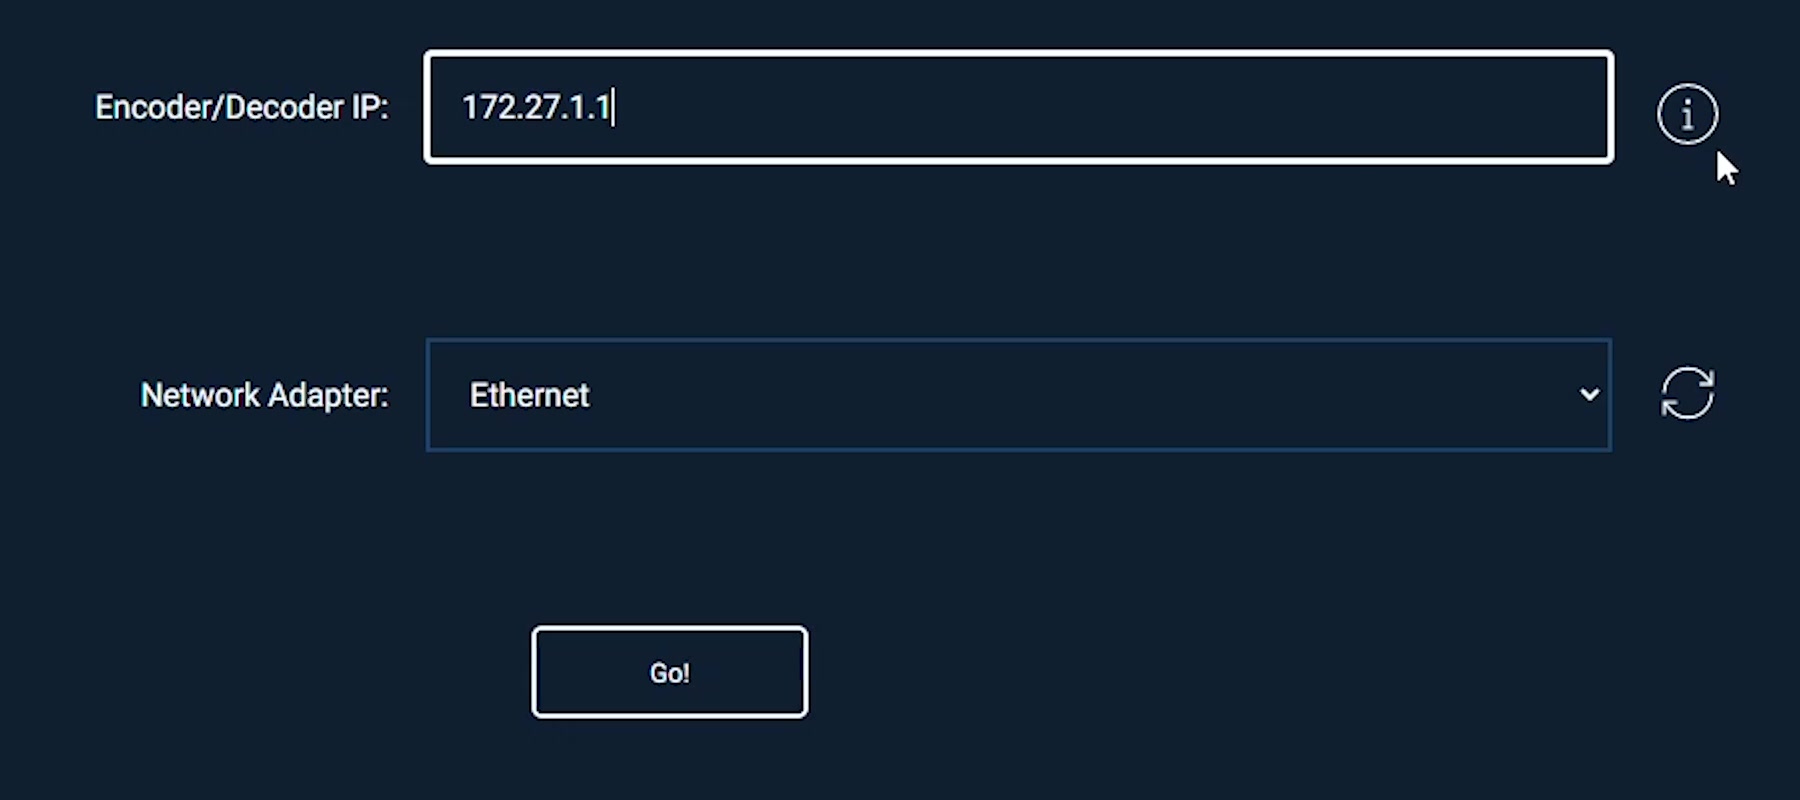
Use an established Just Add Power device's IP address here. The switch management address and the address of a new, unconfigured device do not identify the established device AMP needs for this step. The address shown in the screenshot is an example; use the address from this installation.
Identify Available Ports
Review the switch diagram and its legend. Available Decoder ports appear in light blue, and available Encoder ports appear in dark blue. Orange ports are Data Network ports. Gray ports are unavailable for pairing in this workflow.
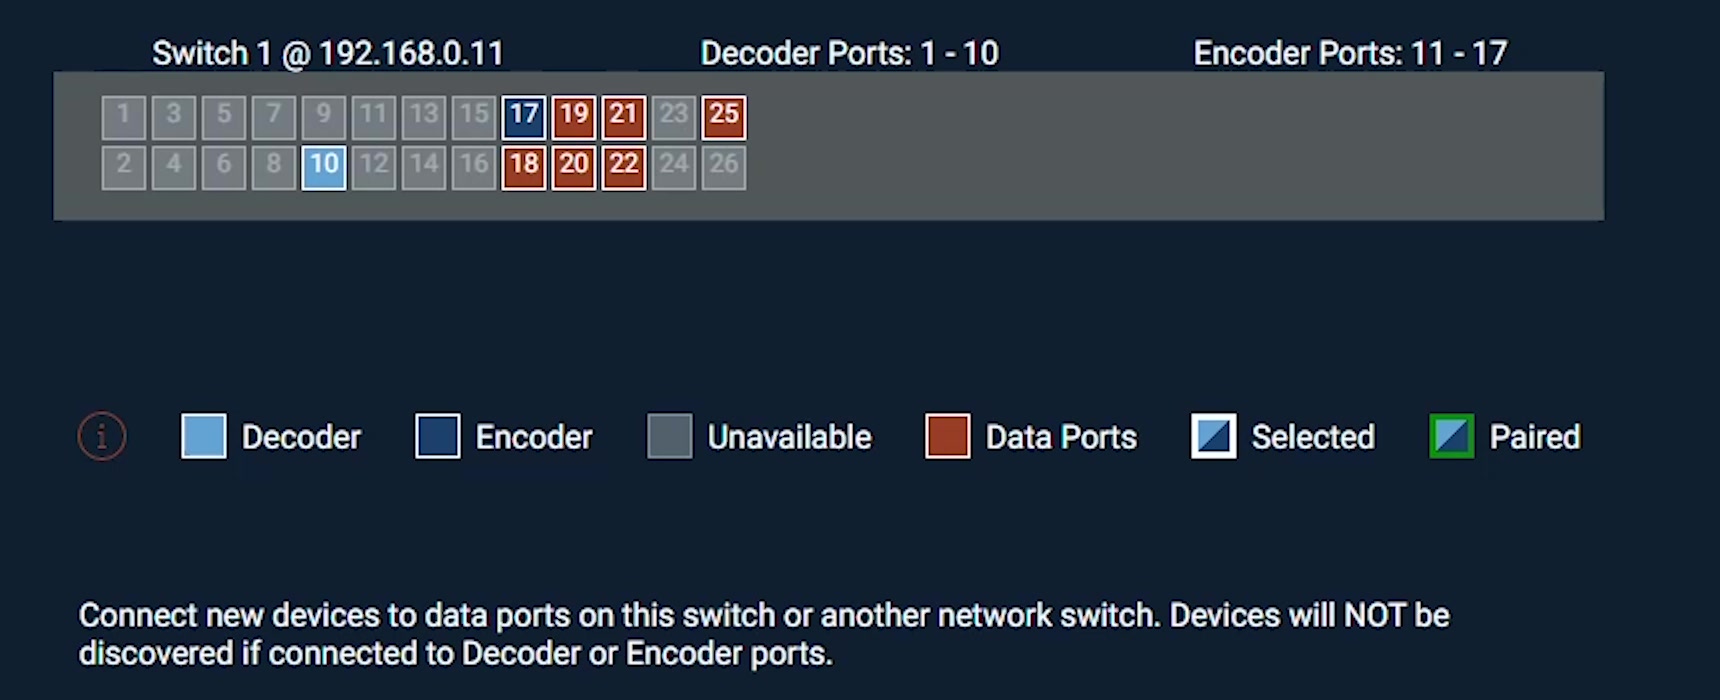
- Match each new Decoder to an available Decoder port.
- Match each new Encoder to an available Encoder port.
- For a multi-switch system, record both the switch number and physical port number.
In the example, Switch 1 has an available Decoder assignment on port 10 and an available Encoder assignment on port 17. Use the available assignments displayed for your system.
No Available Expansion Ports
If there are no available ports of the required type, use Build New to rebuild the switch configuration with the required Encoder and Decoder port counts. Add Devices cannot convert an ordinary Data Network port into an expansion port.
Build New overwrites the existing switch configuration. Retain the current system report and switch configuration, review the resulting port assignments, and plan a service interruption before rebuilding. Do not manually change standardized Encoder, Decoder, or VLAN settings to create an expansion port.
For a single-switch system, follow Build a New Single-Switch System with AMP Standardized Configuration. For a multi-switch system, also review Multi-Switch Considerations for AMP Standardized Systems before changing the design.
Connect and Discover the New Devices
- Connect the new devices to Data Network ports on the same local network as the PC. These ports can be on the Just Add Power switch or another switch connected to that network.
- Provide suitable PoE or the device's supported power supply.
- Allow the devices to complete startup and wait for them to appear in AMP.
- Check the model and MAC address of each discovered device against the hardware you intend to add. Click Rescan if needed after correcting a connection or adding another device.
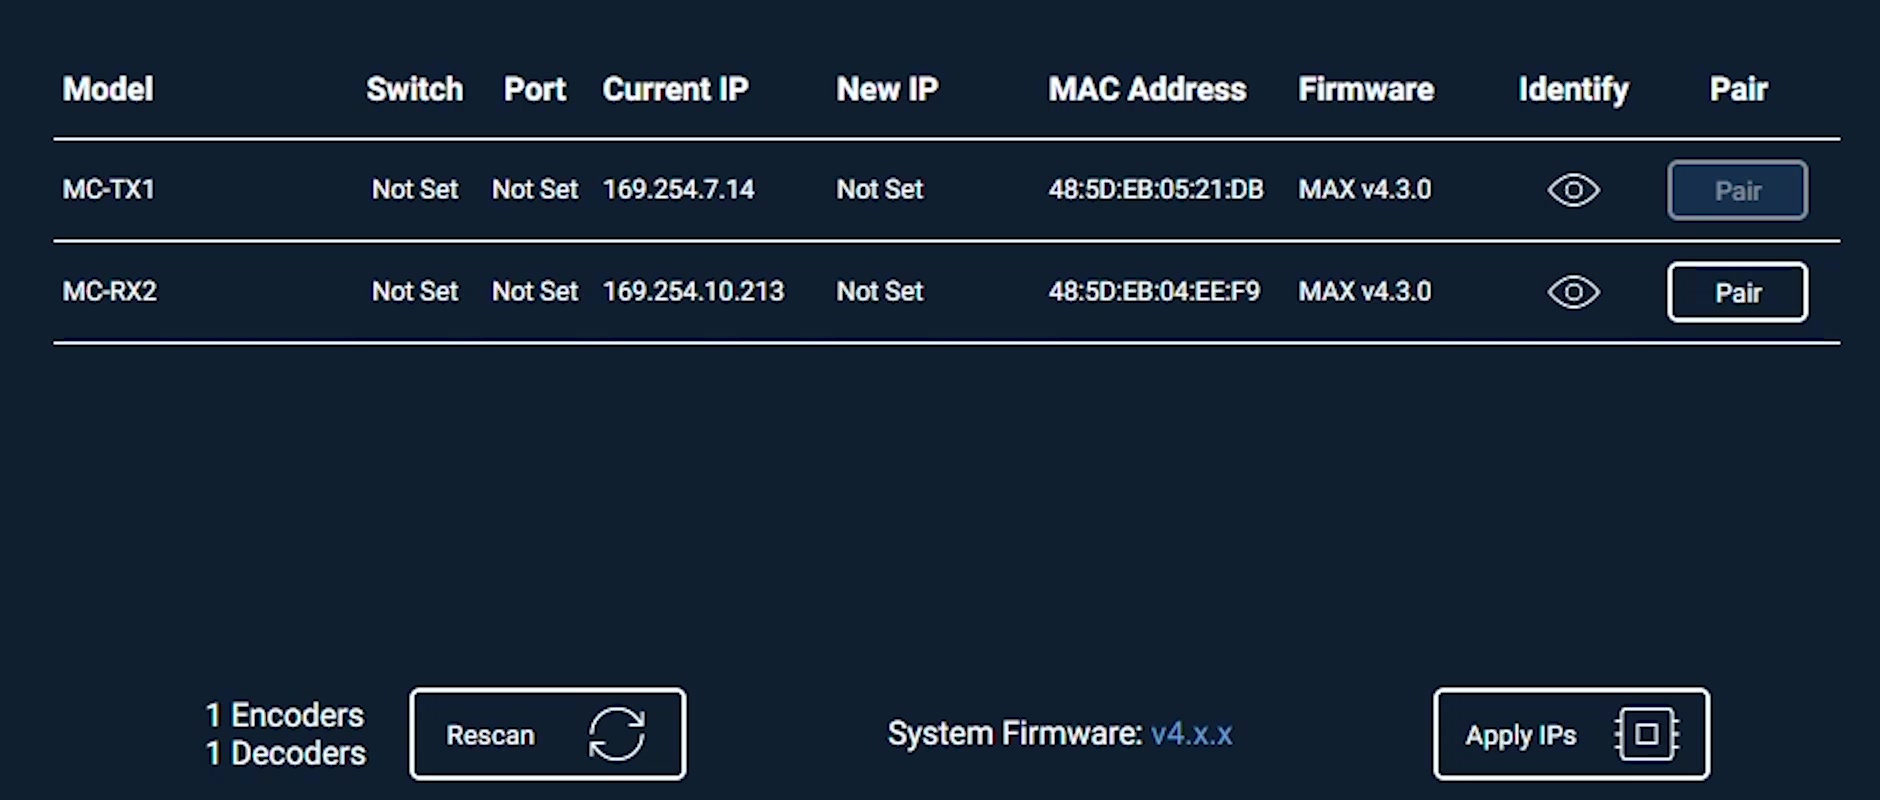
Keep new devices on Data Network ports: AMP states that devices connected to Encoder or Decoder ports will not be discovered at this stage. Leave them on their temporary connections until configuration is complete.
During startup, allow the Power LED heartbeat to finish. On Omega Series, Ultra Series, and MaxColor Series devices with default LED behavior, a solid Power LED and blinking Data LED indicate completed startup and a network link without compatible video. AMP can change LED behavior during identification, so confirm discovery in the device list. For an abnormal startup or missing link, see Understand Power and Data LED Behavior.
Pair the New Devices to Available Ports
Pairing assigns a device to its final switchport and stages its new IP settings. It does not select which Encoder a Decoder will watch.
- Select an available Decoder or Encoder port in the switch diagram.
- Click Pair in the row for the matching new device.
- Confirm that the port turns green and the device row shows the intended Switch, Port, and New IP.
- Repeat for every device you intend to configure.
- Record or label each device's MAC address, assigned switch, physical port, and new IP address.
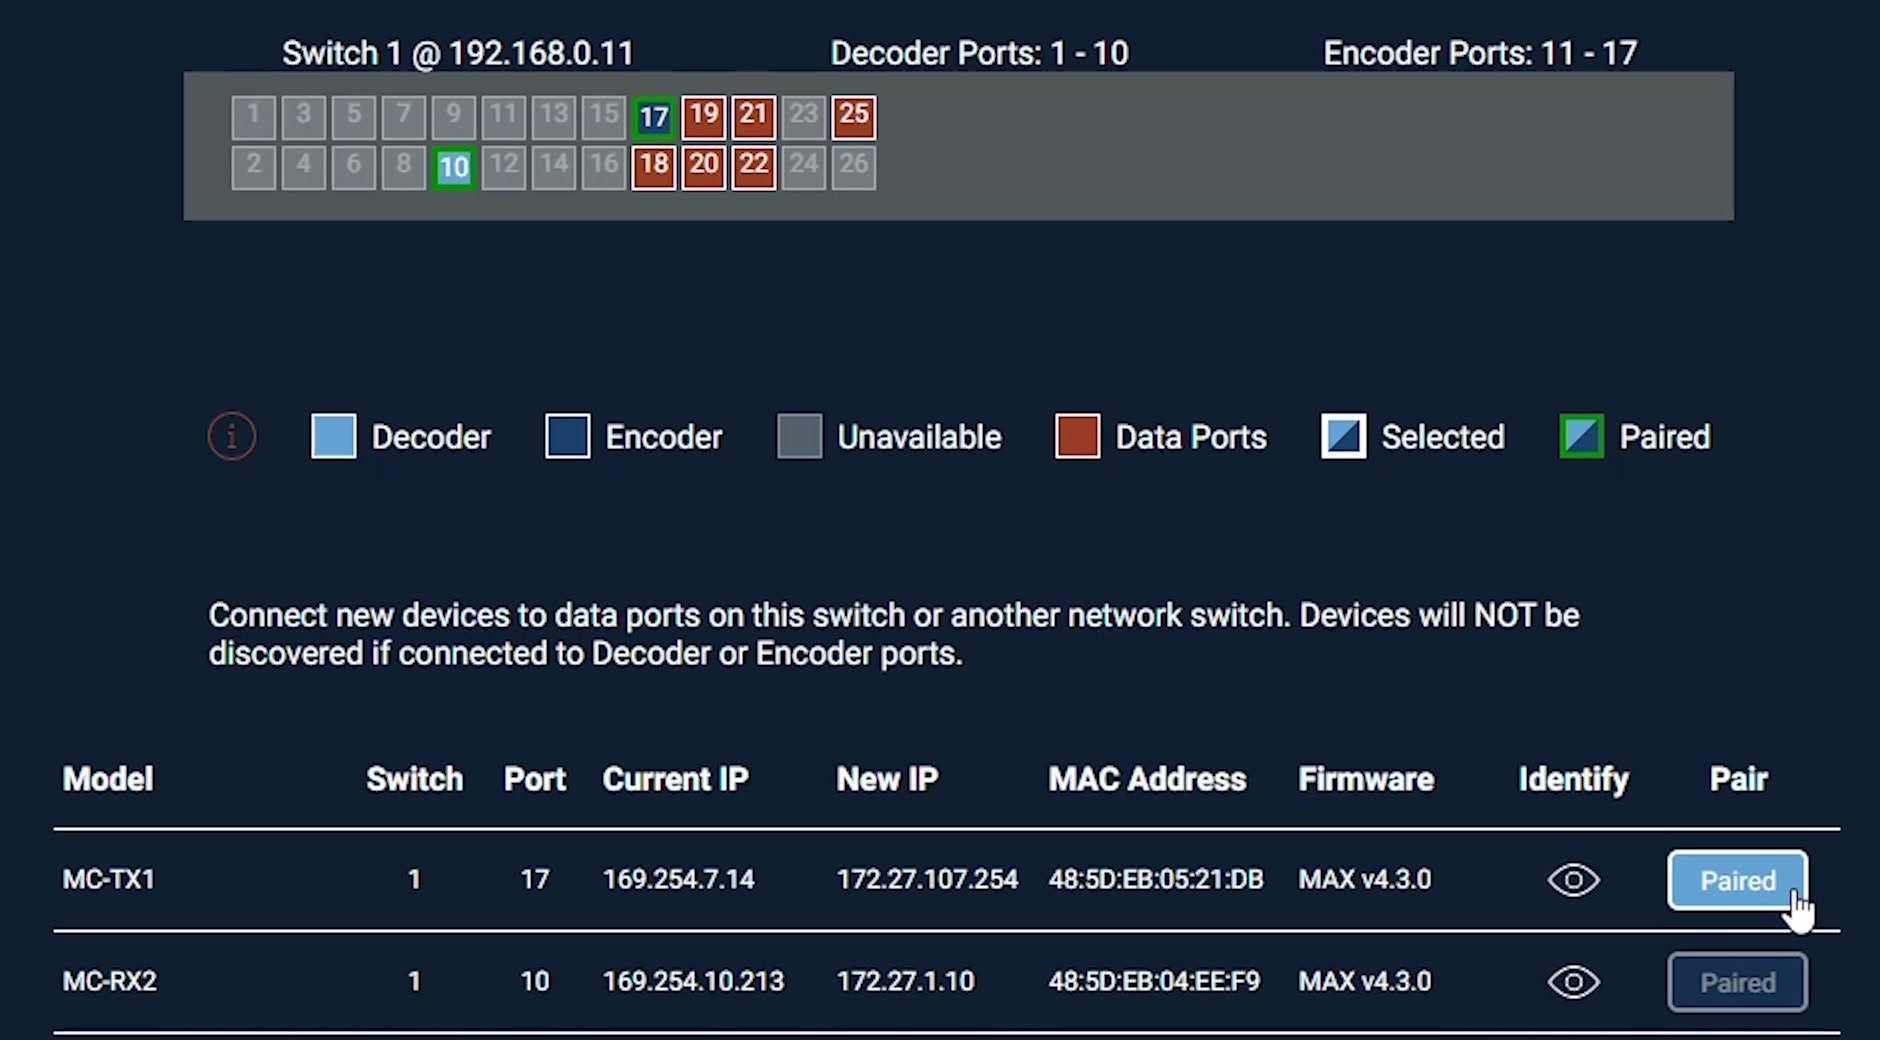
The Current IP is the address used before configuration. The New IP is the staged address for the selected assignment. A green port confirms pairing in AMP; the settings still need to be applied, and the device must then be moved to that physical port.
Correct a Pairing
- Click the green paired port in the switch diagram.
- Click Yes when AMP asks whether to clear the port's pairing.
- Select the correct available port and click Pair beside the intended device.
Review all assignments before applying the configuration.
Apply IP Settings
- Confirm that every intended device is paired with the correct switch and port.
- Click Apply IPs.
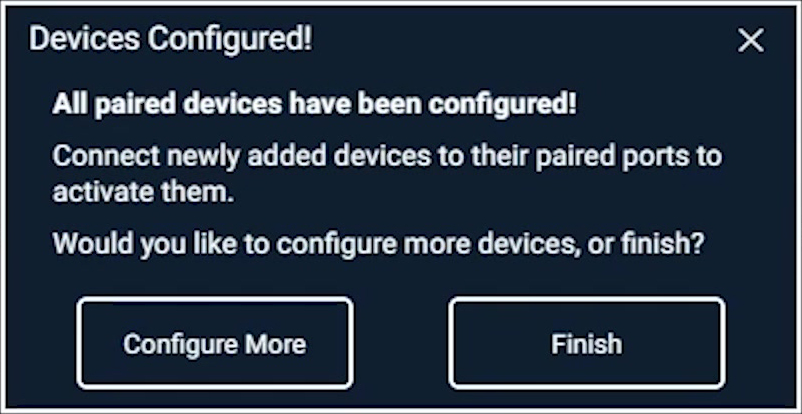
- Wait for the Devices Configured! confirmation.
Do not interrupt configuration: Keep AMP open and maintain power and network connections until the confirmation appears. Move the devices only after AMP confirms that configuration is complete.
Move the Devices to Their Final Ports
- Disconnect each newly configured device from its temporary Data Network port.
- Connect it to the exact switch and Encoder or Decoder port paired with it in AMP.
- Allow devices powered by PoE to restart after being moved.
- Click Finish when the devices are connected to their assigned ports and you are ready to continue.
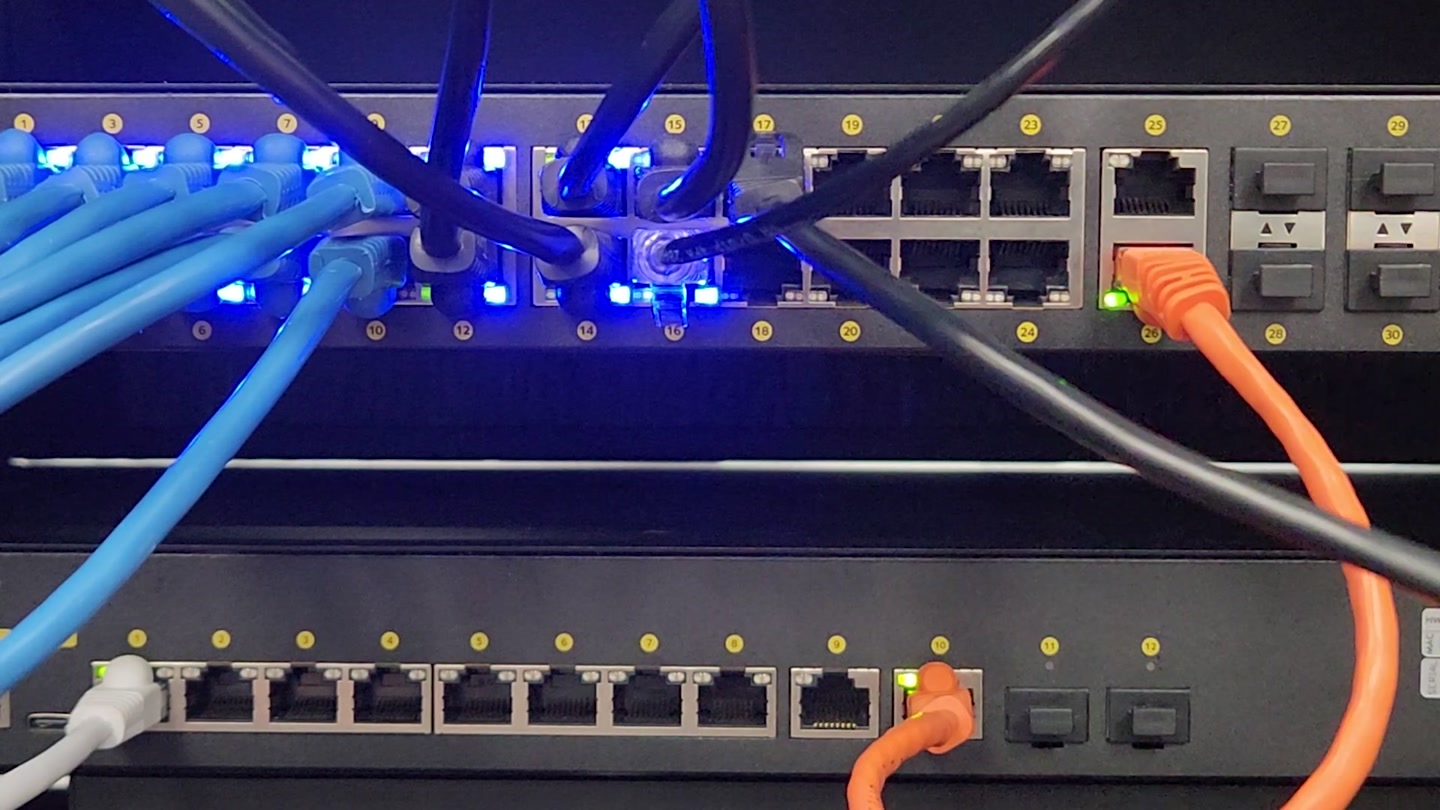
Use the recorded switch and port assignments to check each connection. An available port elsewhere on the switch does not replace the port selected during pairing.
If you need to configure another group, select Configure More in the confirmation dialog and repeat discovery and pairing before finishing.
Resolve Incompatible Firmware
If a new device's firmware is incompatible with the established system, AMP opens the Incompatible Devices page. IP configuration alone does not establish firmware compatibility.
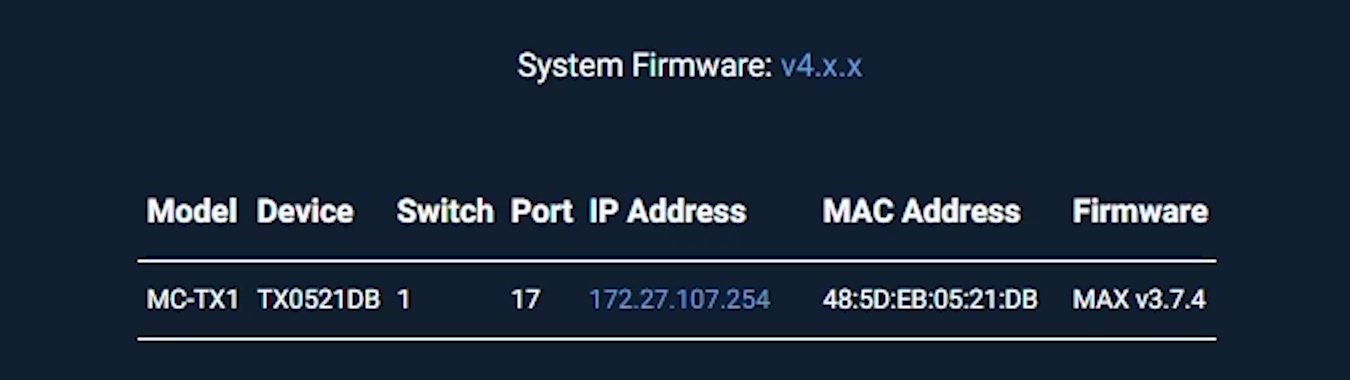
- Review the listed devices and the displayed system firmware information.
- Confirm that the new devices have been moved to their paired ports.
- Click Update Now.
- Allow AMP to complete the firmware update and any required restarts.
- Follow the remaining prompts and allow AMP to finish cleanup before closing it.
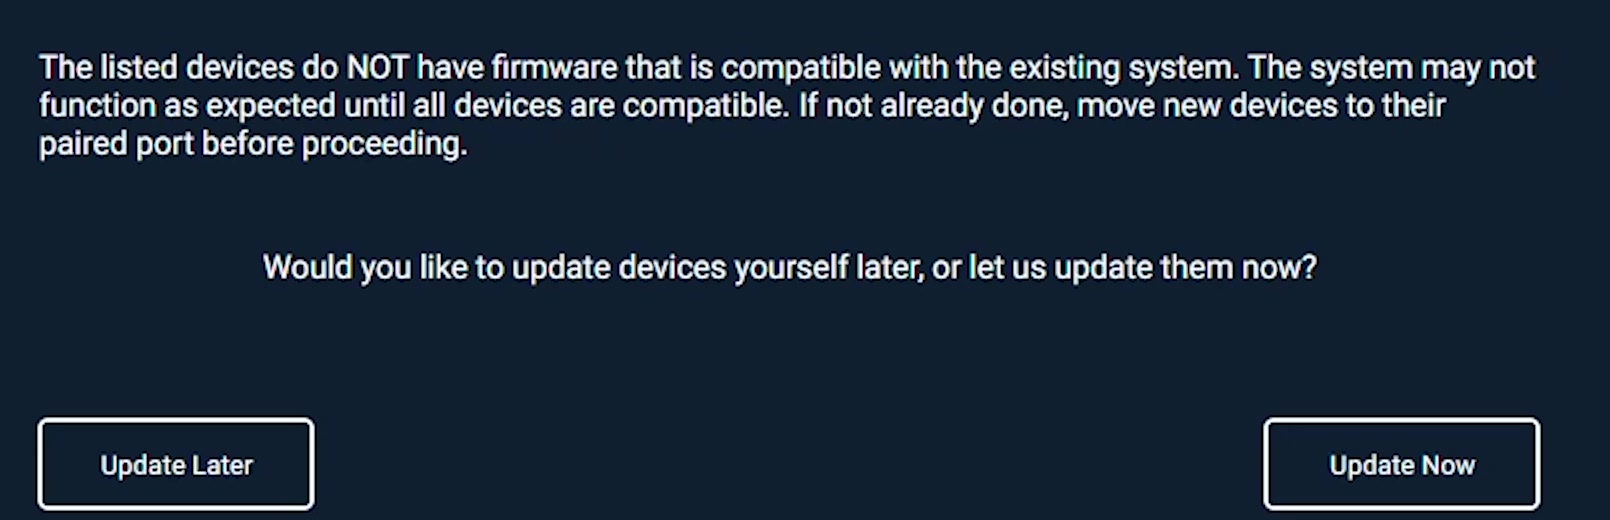
Do not interrupt a firmware update: Maintain device power, network connections, and the PC connection. Keep AMP open until the update completes. Selecting Update Later leaves the compatibility issue unresolved; complete the required update before treating the installation as ready for use.
If the new devices are already compatible, AMP proceeds without requiring this update. Use the compatibility result for the established system rather than copying the example firmware versions in the screenshots.
Verify and Document the Expanded System
- Connect the required sources, displays, and any additional audio, USB, or control connections.
- Test each new Encoder by selecting it on a compatible, known-working Decoder.
- Test each new Decoder by selecting a compatible, known-working Encoder.
- Verify video, audio, and any additional features required for the installation.
- Update the control system programming with the new inputs, outputs, and device IP addresses where required. Test switching from the customer's control interface.
- Use Gather Details in AMP to save an updated report containing the system's IP addresses, device count, and port connections.
Keep the updated report with the site documentation. Configuring a new device in AMP does not complete the control system programming needed to expose that input or output to the customer.
Troubleshooting
AMP Cannot Retrieve the Established System
- Confirm that the entered IP address belongs to a powered, connected Encoder or Decoder in this system.
- Verify that the established device is connected to its assigned switchport.
- Confirm that the PC is wired to the correct site network and that the corresponding adapter is selected in AMP.
- Try another active device in the established system.
If the PC cannot access the Device Network, review Static Route Options for Accessing the Just Add Power Device Network. A control processor's gateway setting provides access for that processor; it does not provide the PC with the same access.
A New Device Is Not Discovered
- Check whether one device or all new devices are missing. If all are missing, check the shared PC connection, selected adapter, and temporary network connections first.
- Confirm that each new device is connected to a Data Network port on the same local network as the PC, rather than an Encoder or Decoder port.
- Verify power and allow startup to complete.
- For an individual device, test a short, known-working patch cable directly between the device and a suitable Data Network port. If discovery works, inspect the installed cable run, terminations, and intermediate connections.
- Click Rescan after correcting the issue.
A Device Does Not Work After Moving to Its Final Port
- Compare its physical switch and port connection with the recorded pairing.
- Confirm that AMP displayed Devices Configured! before the device was moved.
- Confirm that any required firmware update completed.
- Test with a compatible, known-working Encoder or Decoder and a known-working source or display path.
- If testing works but switching from the customer's interface does not, check the control system's new input, output, and IP assignments.
For continued video, audio, access, or switching problems on Omega Series, Ultra Series, and MaxColor Series systems, follow Troubleshoot a Just Add Power System. For a 2G Legacy Mode system, contact Just Add Power Technical Support with the device models, firmware, AMP version, and port assignments.

