Overview
This article explains how to switch sources in an existing AMP-standardized Just Add Power system using Advanced Matrix Programmer (AMP).
The Switch Sources tool provides a graphical interface for routing Encoders (Inputs) to Decoders (Outputs). Individual Decoders can be switched independently, or all Decoders can be switched to the same Encoder with a single click, making it useful during system setup, testing, troubleshooting, demonstrations, and temporary source switching.
Note: This article applies to existing AMP-standardized systems that have already been configured and are operational. The Switch Sources tool is intended for installers and technicians to perform source switching during system setup, testing, troubleshooting, and demonstrations. It is not intended to replace an end-user control system.
For a free software-based control interface designed for everyday source switching, see MediaSwitcher4.
Before You Begin
Before connecting to an existing Just Add Power system using Advanced Matrix Programmer (AMP), ensure the following requirements are met:
-
Advanced Matrix Programmer (AMP) installed on a Windows PC.
-
A Just Add Power system that has already been configured using AMP.
-
A static route configured on the network router or Windows PC. See Setup a Static Route for an Established Just Add Power System.
-
Documentation containing the IP address of at least one Just Add Power device in the system.
Need System Information?
If you have access to the Windows PC originally used to configure the system, see How to Open Projects Folder using AMP for Standardized & Alternate Systems to locate the project documentation.
If the system is online but the project files are unavailable, see How to Gather System Details using AMP to collect the current system information.
If you do not have access to the original PC and cannot connect using AMP, follow the Just Add Power System Takeover Guide to identify the system information manually.
Switching Sources
-
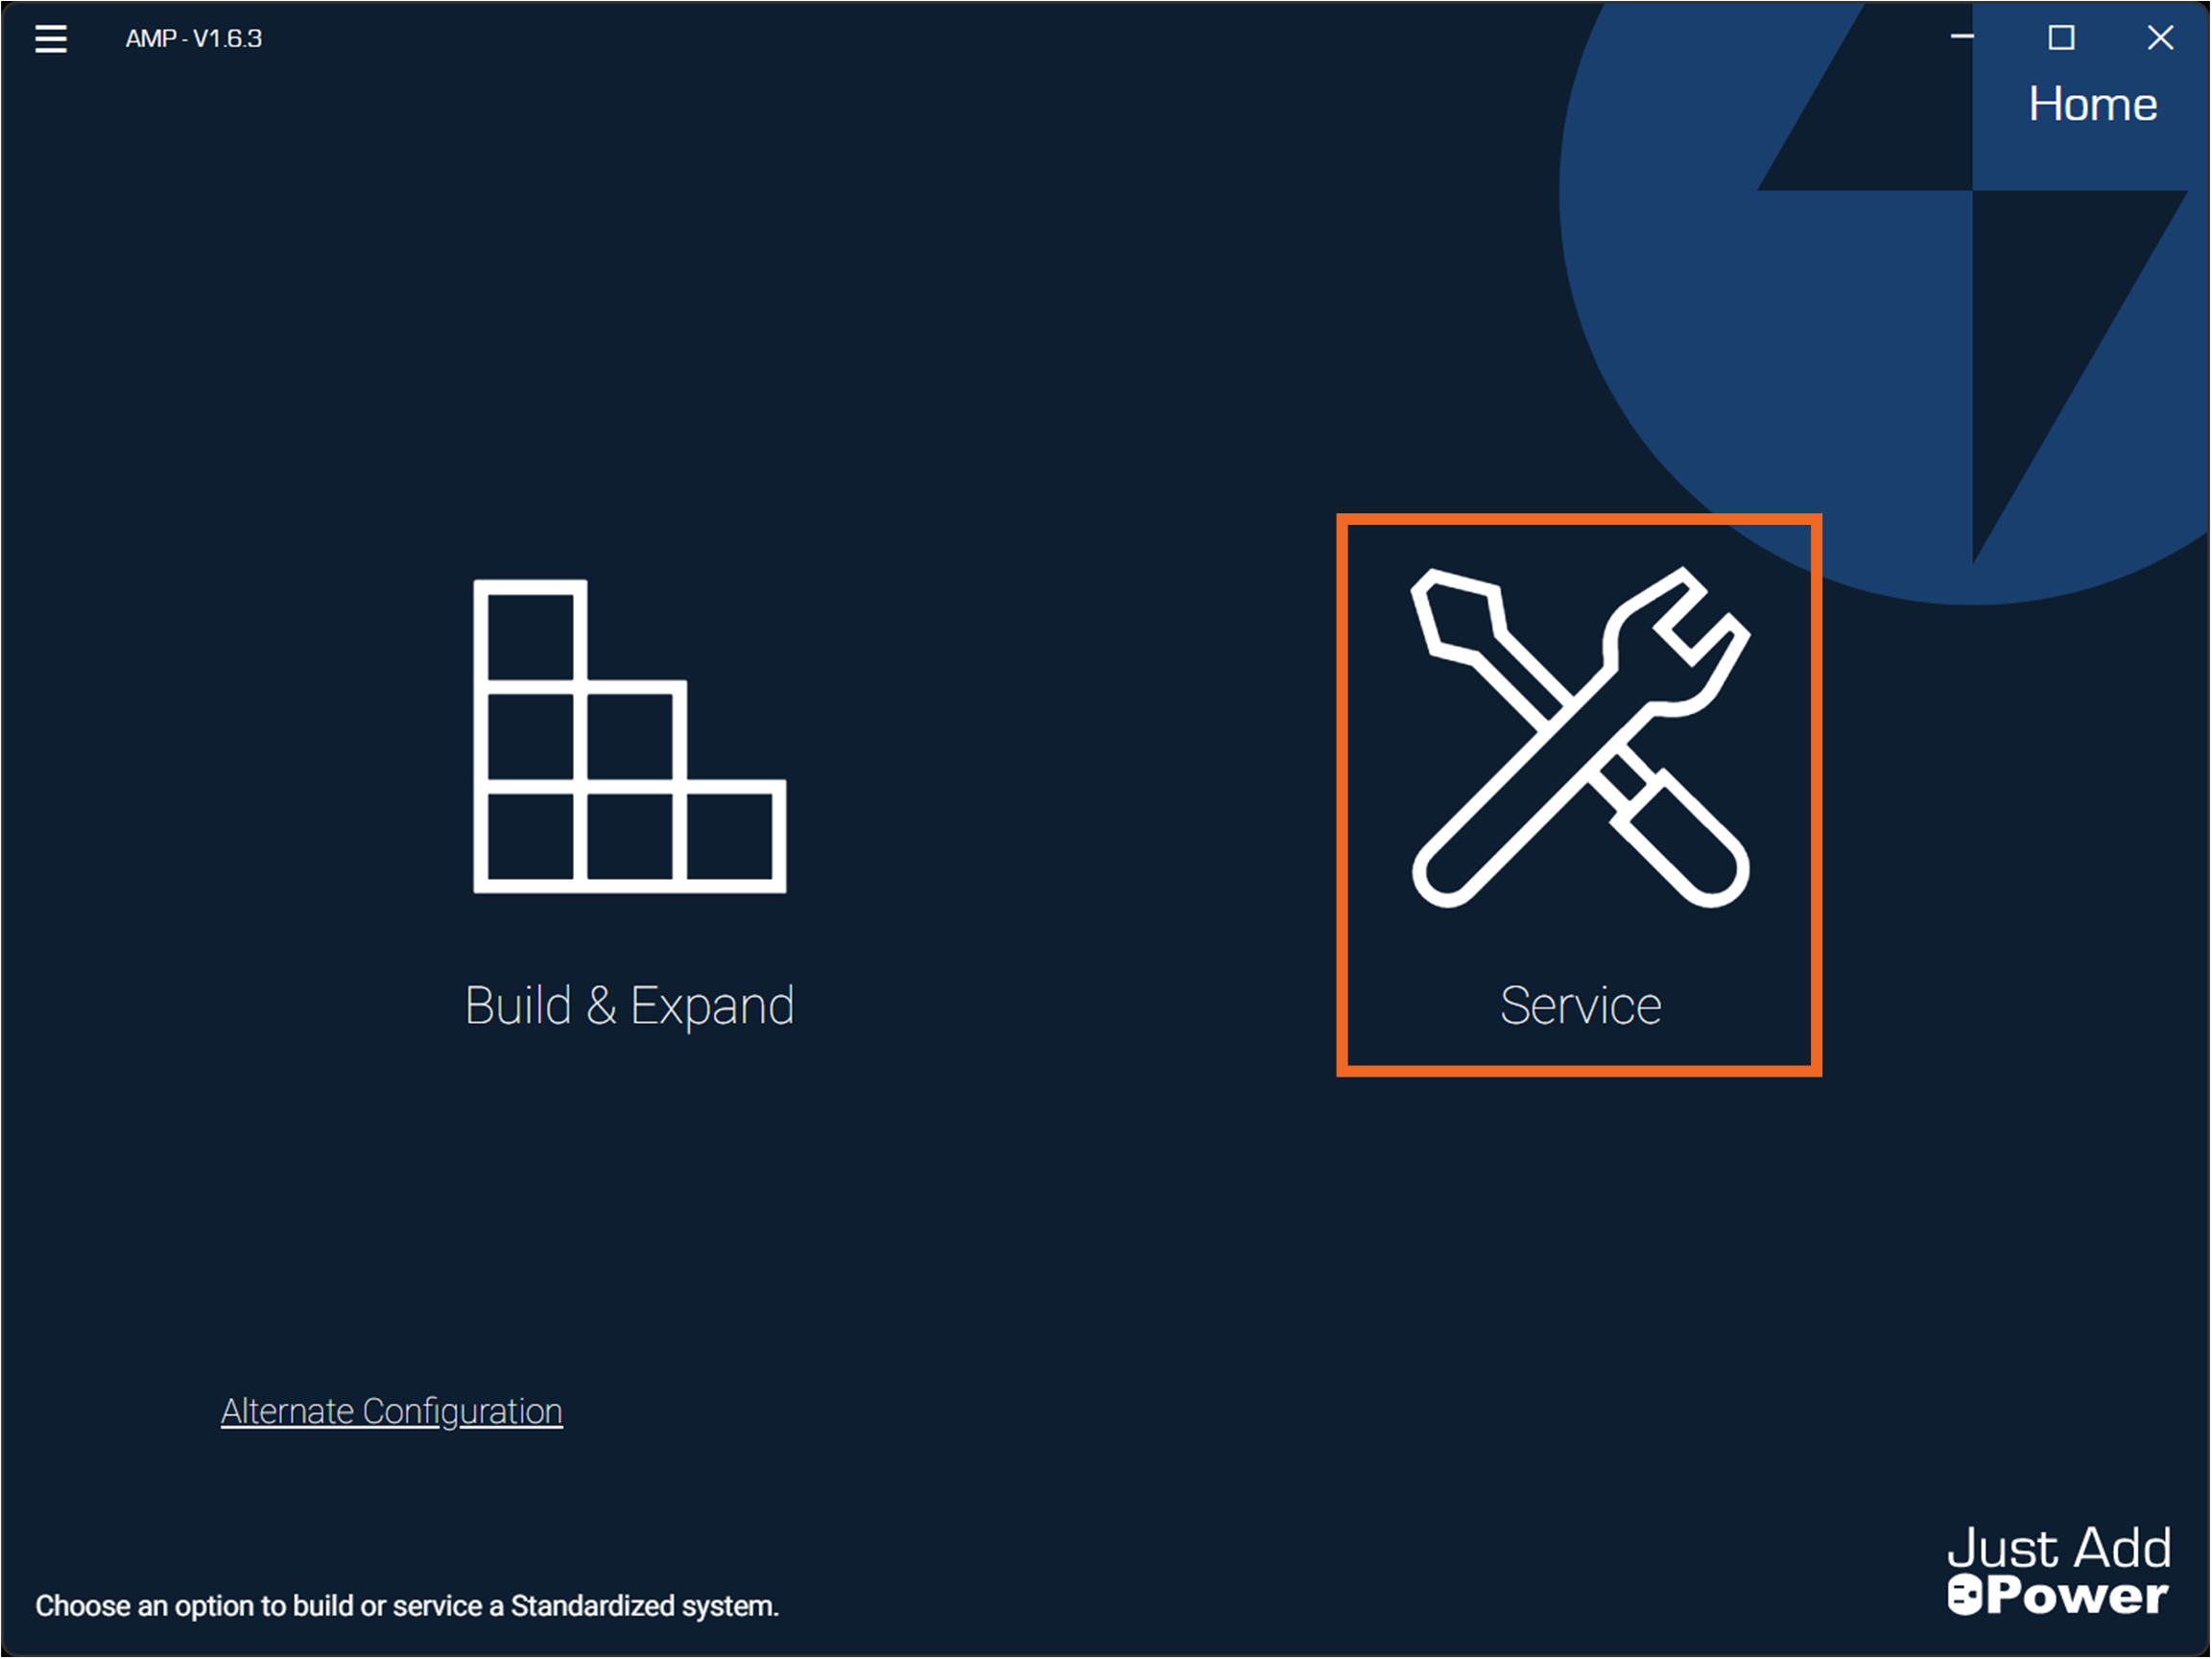
Open Advanced Matrix Programmer (AMP) and select Service.
-
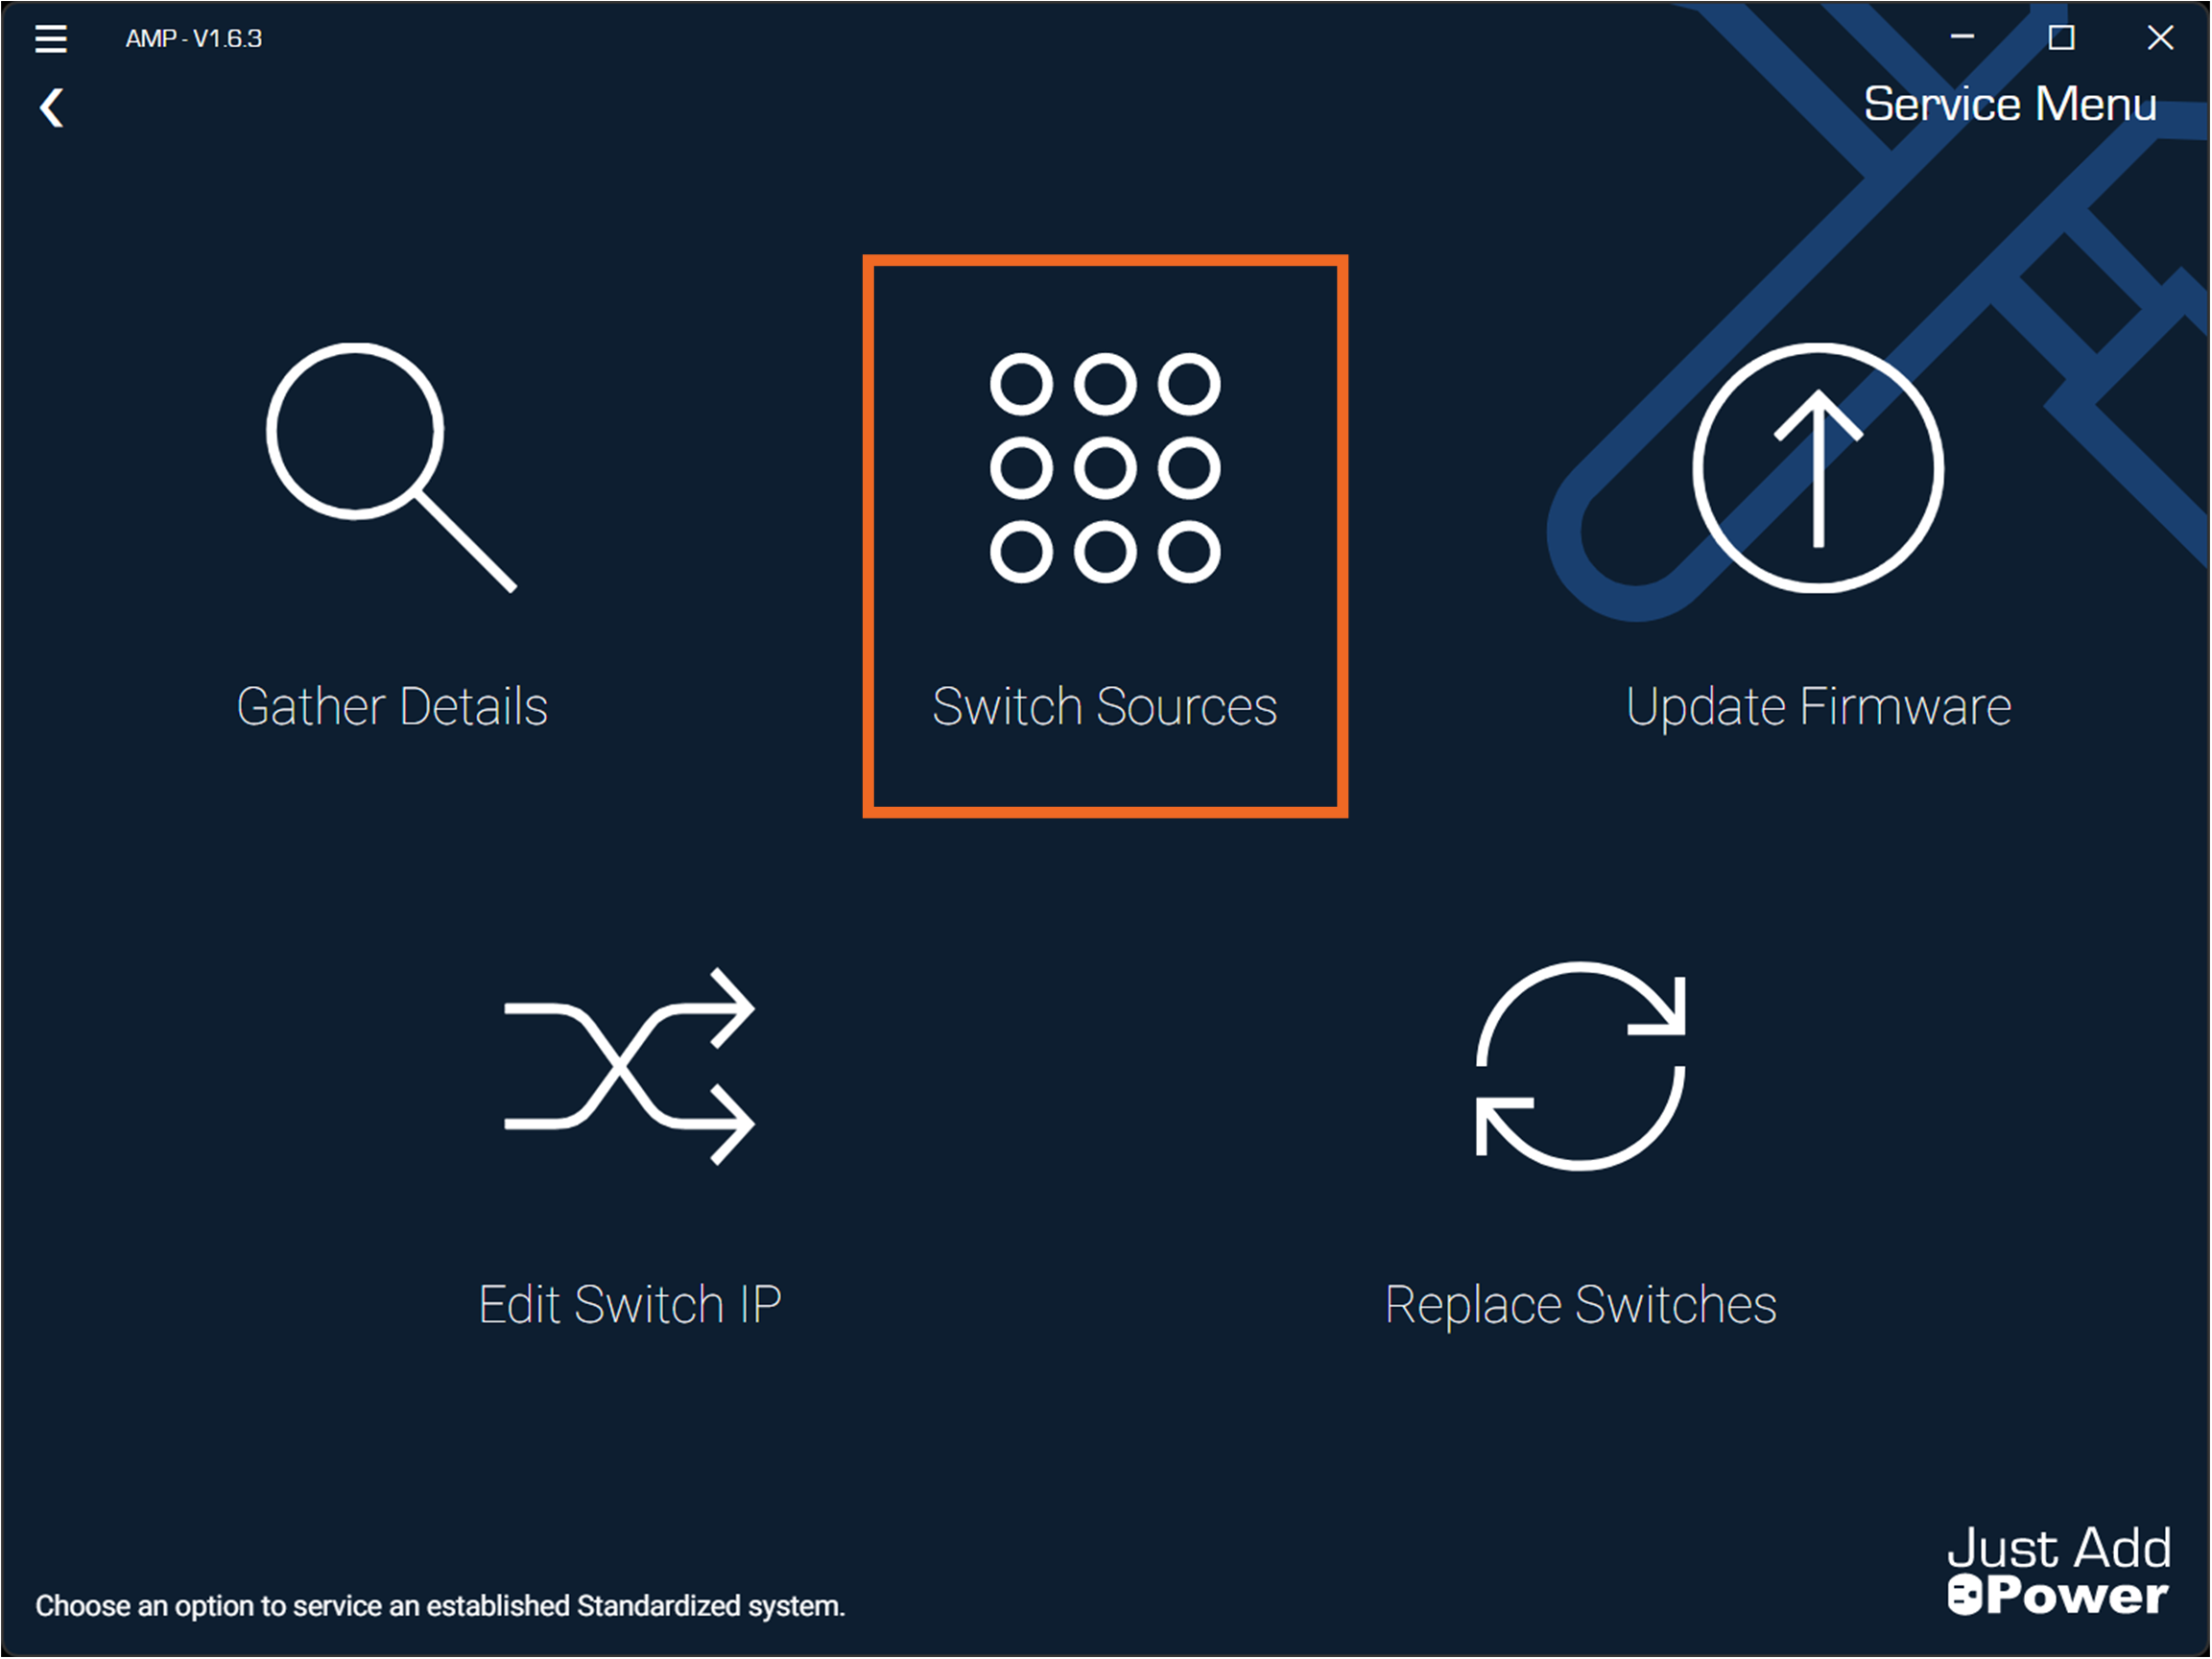
On the Service page, click Switch Sources.
-
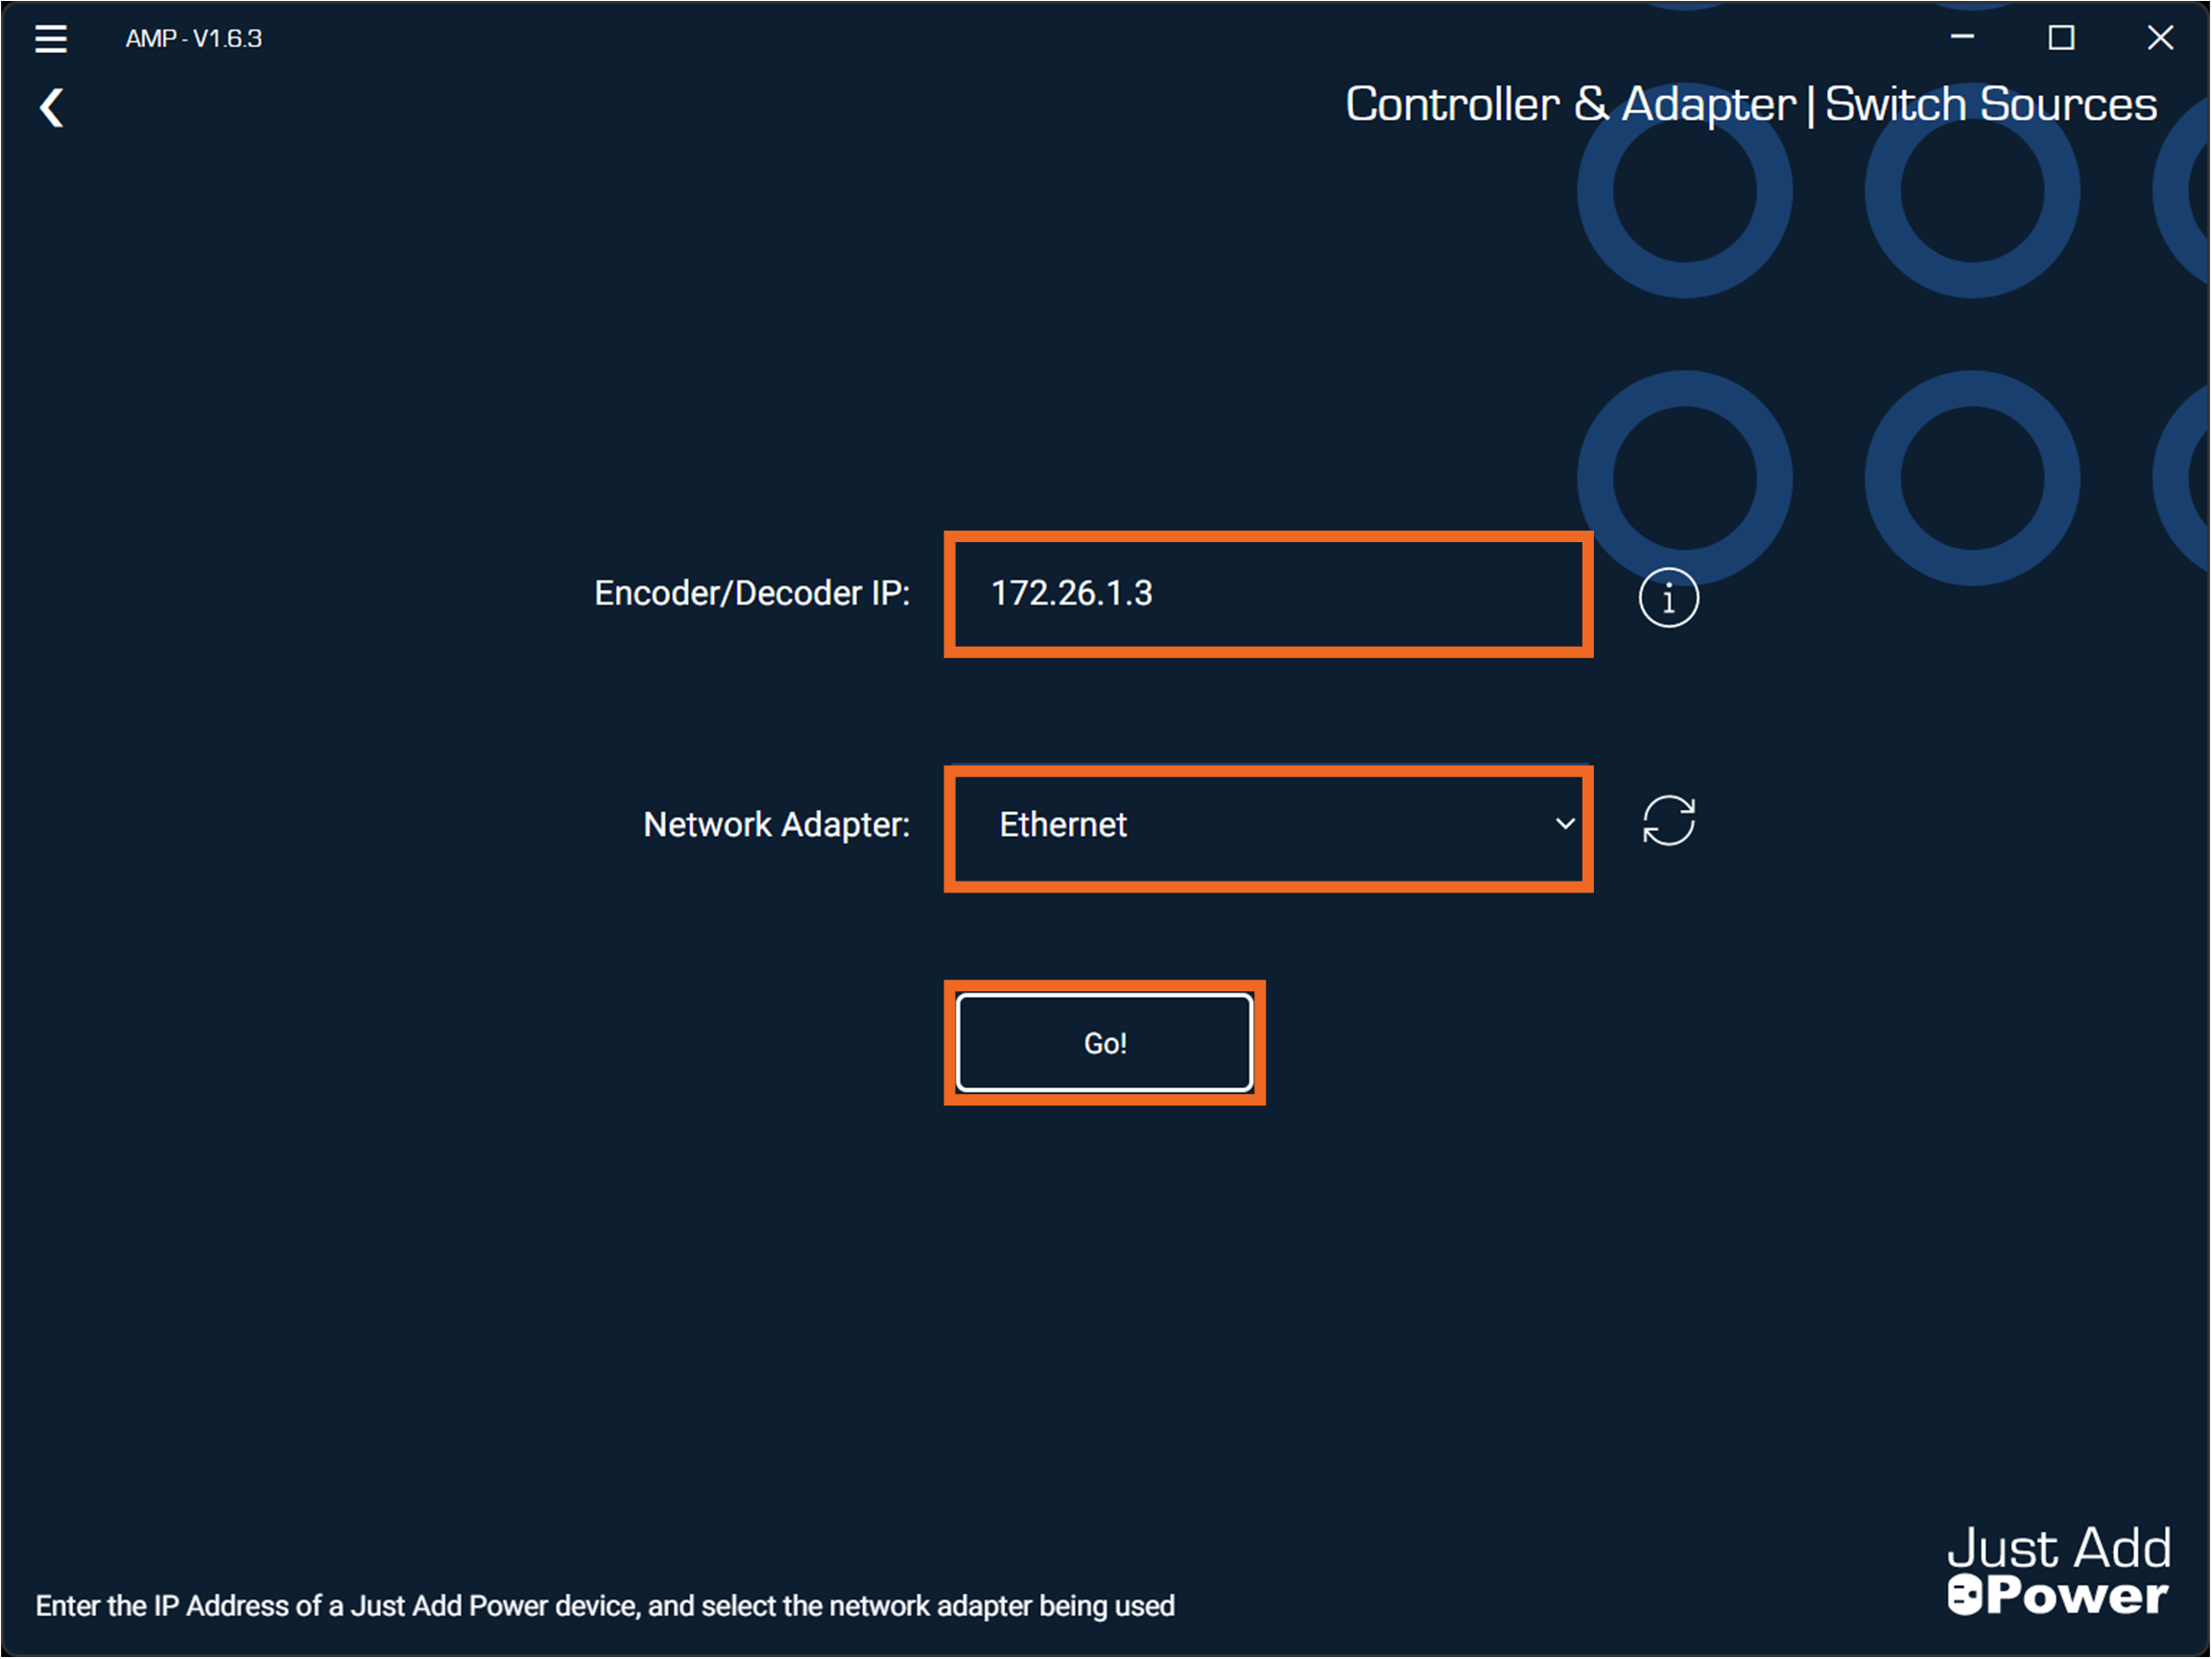
Enter the IP address of any active Just Add Power device, then click Go!.
Use your system documentation to identify a valid device IP address. The Windows PC may be connected using either Ethernet or Wi-Fi, provided it has network communication with the Just Add Power Device Network.
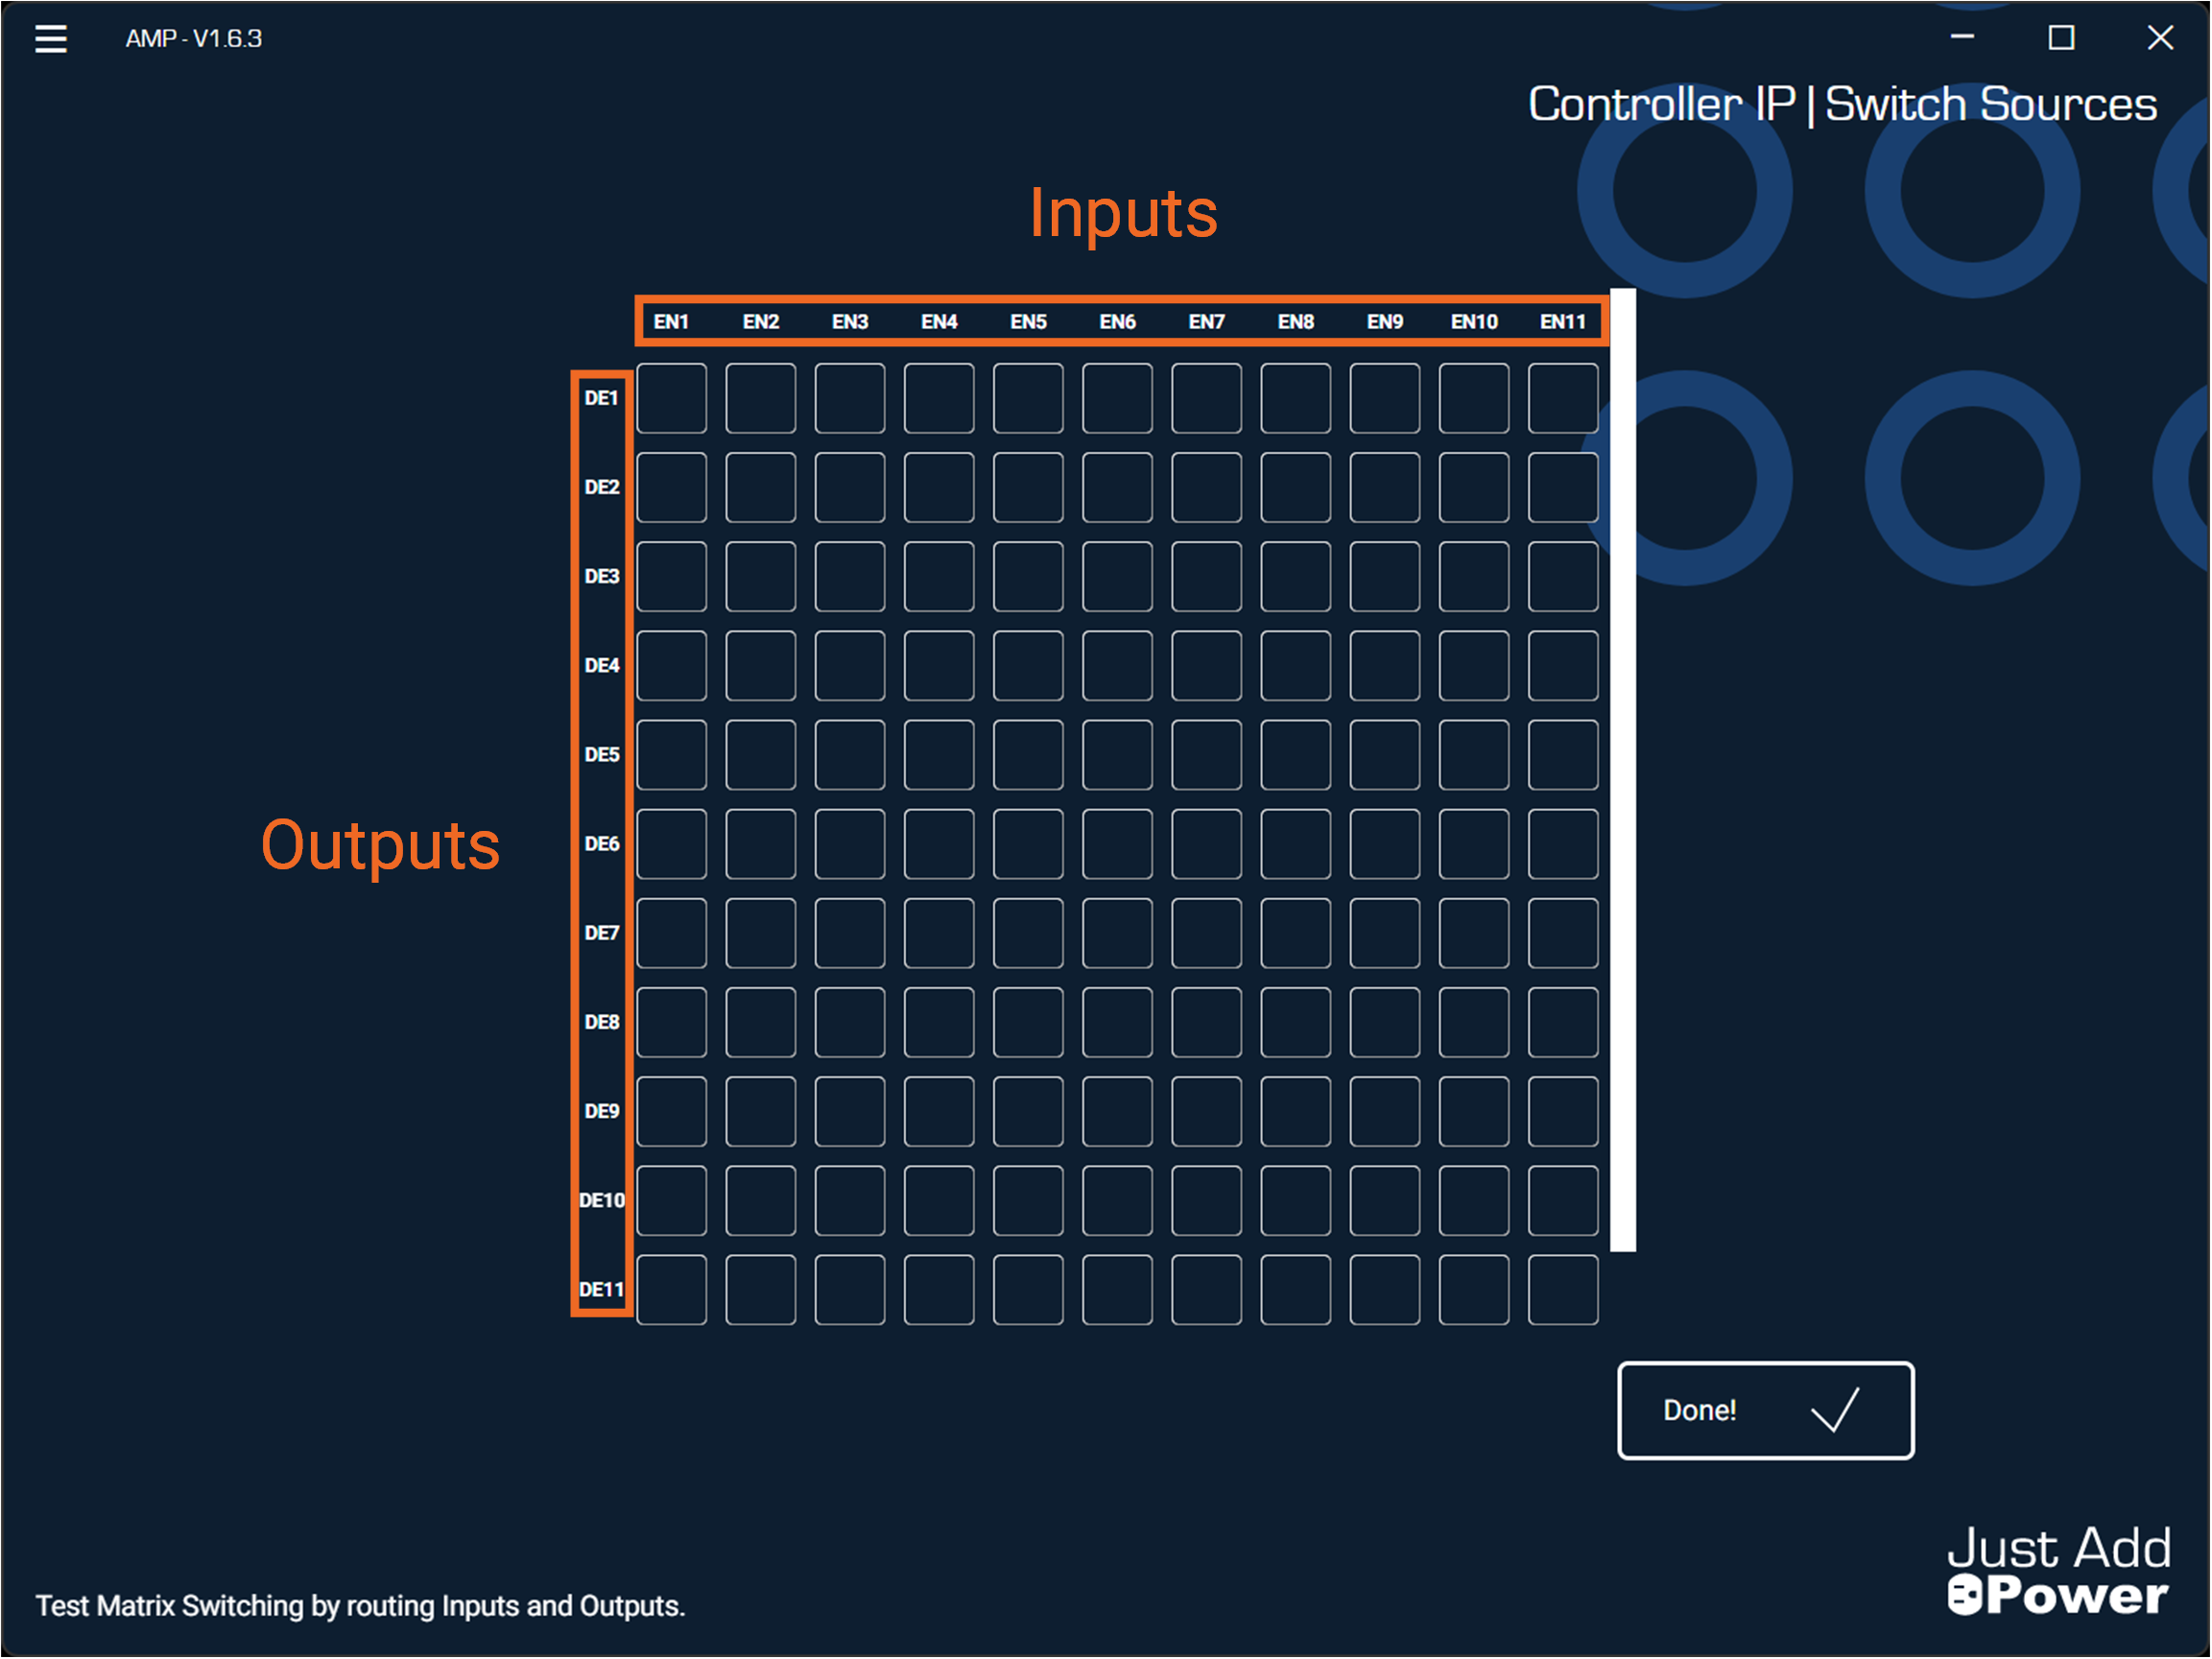
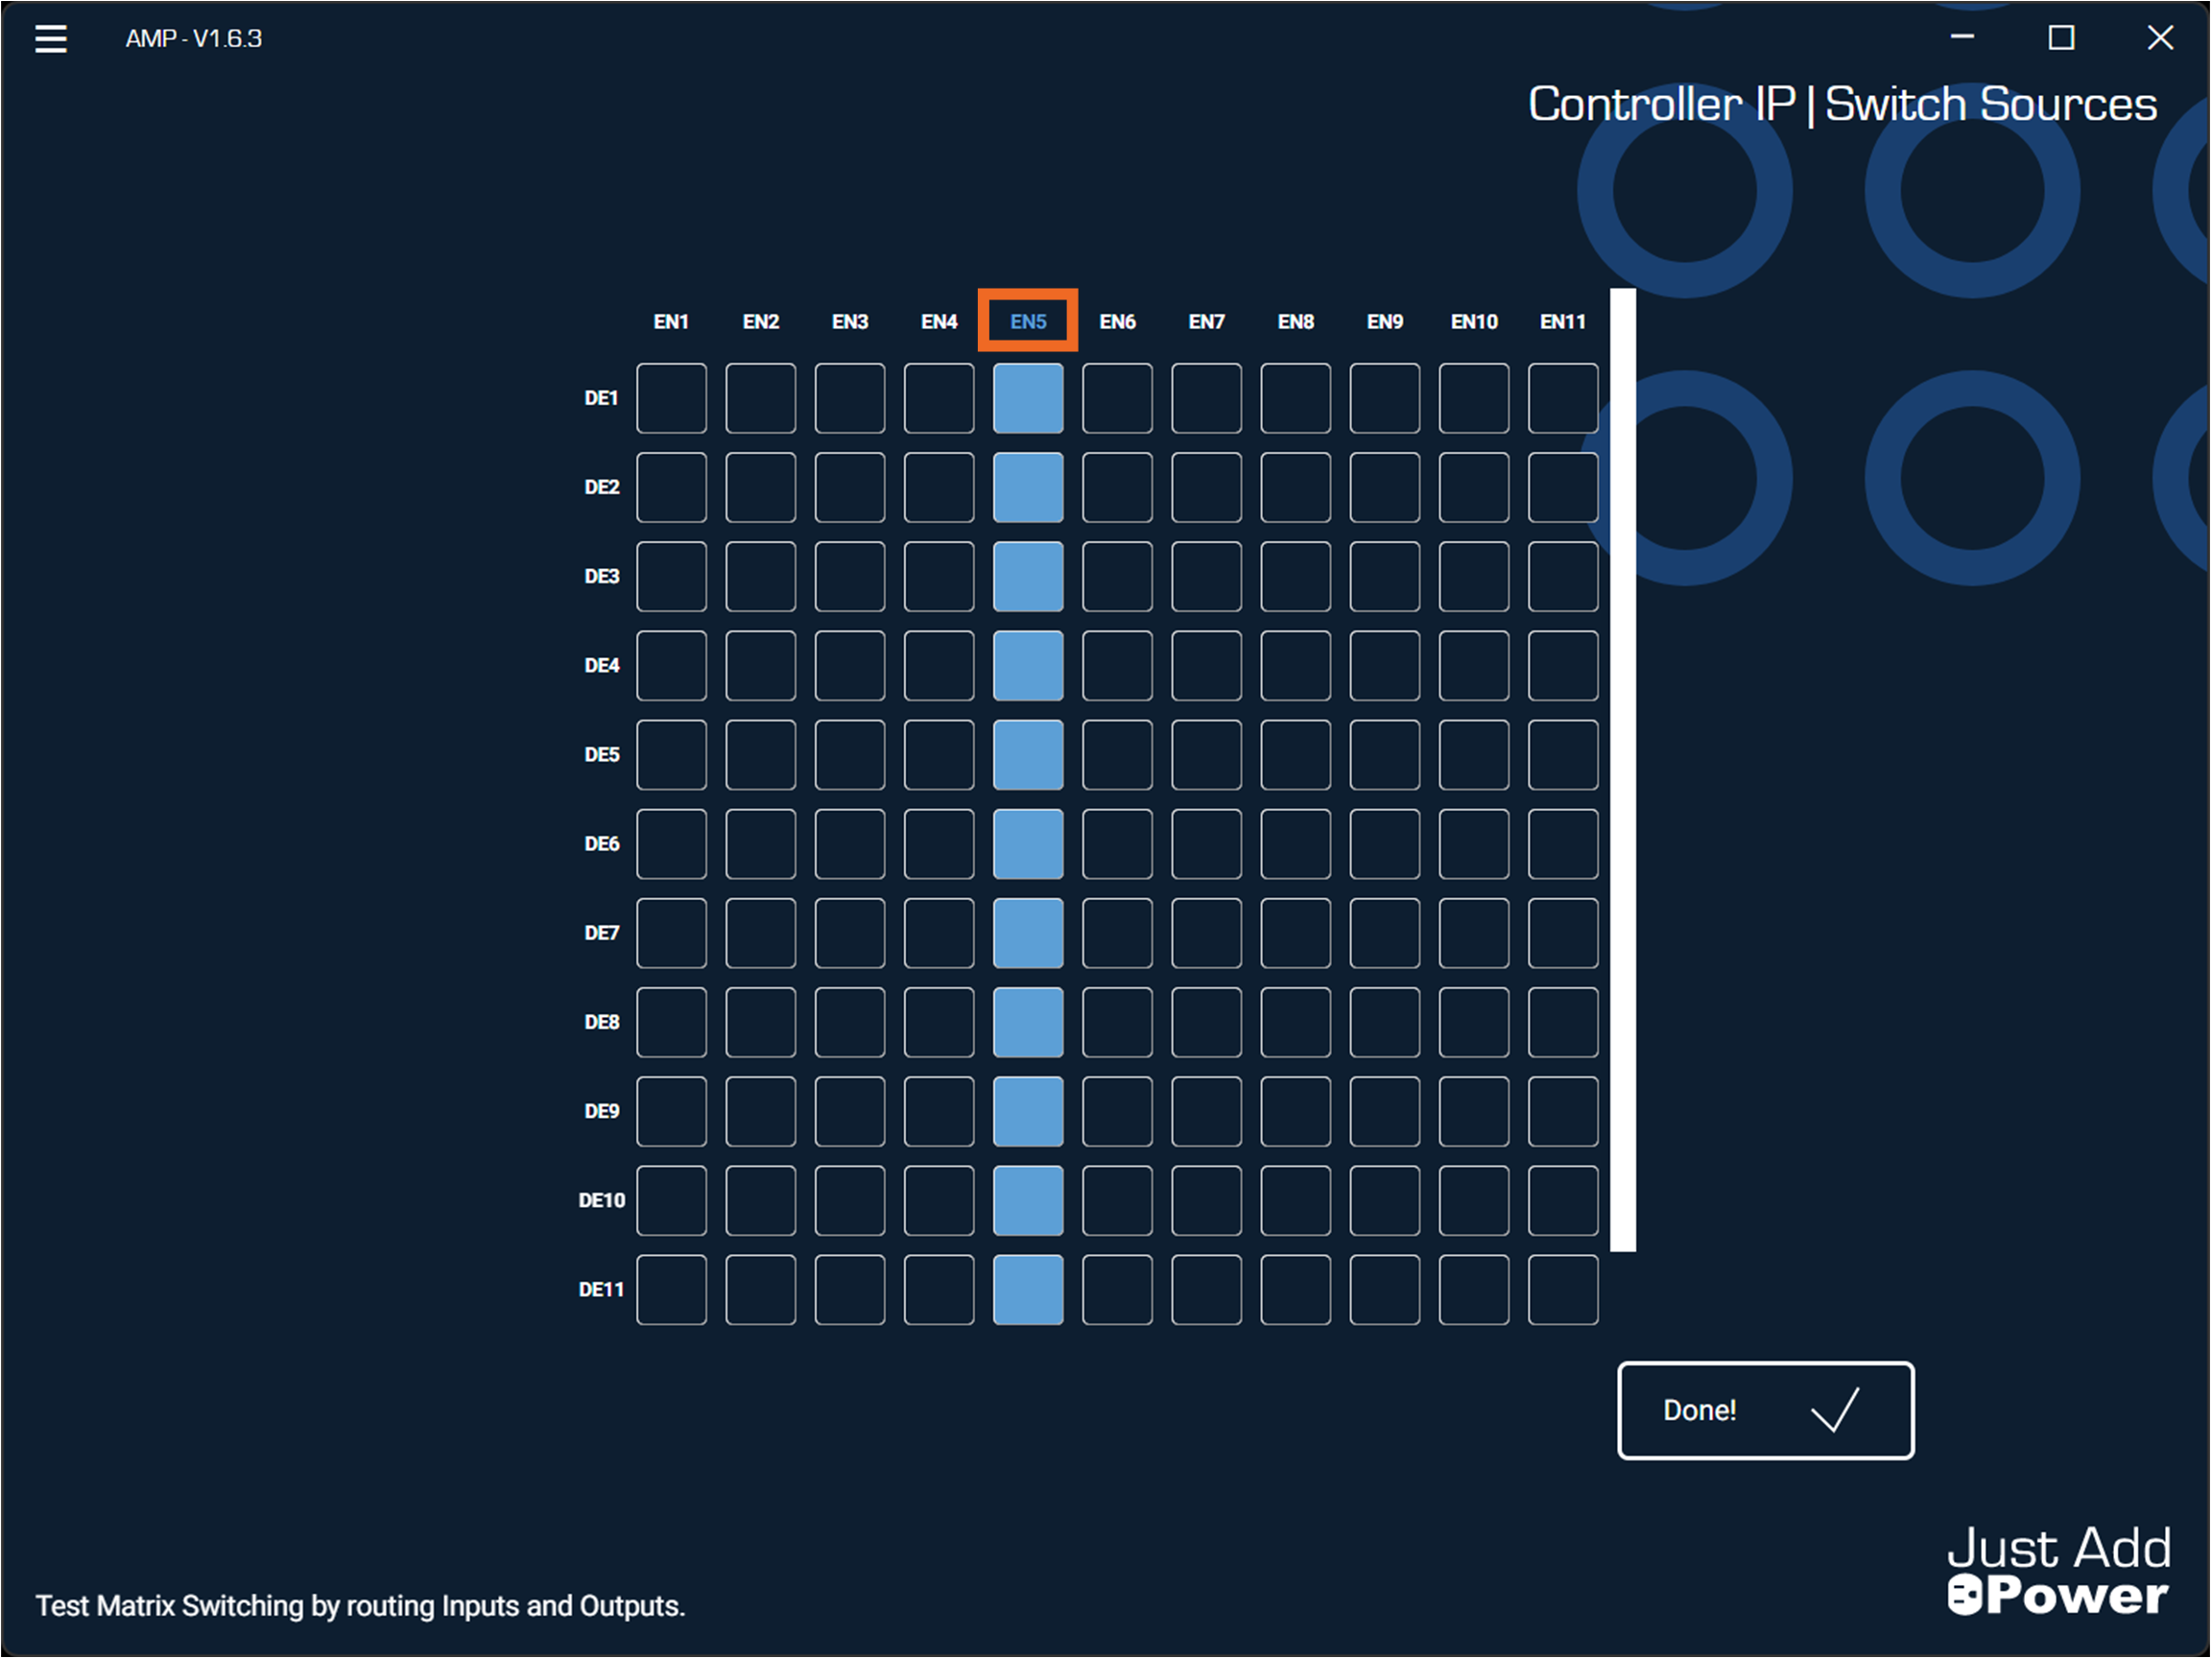
-
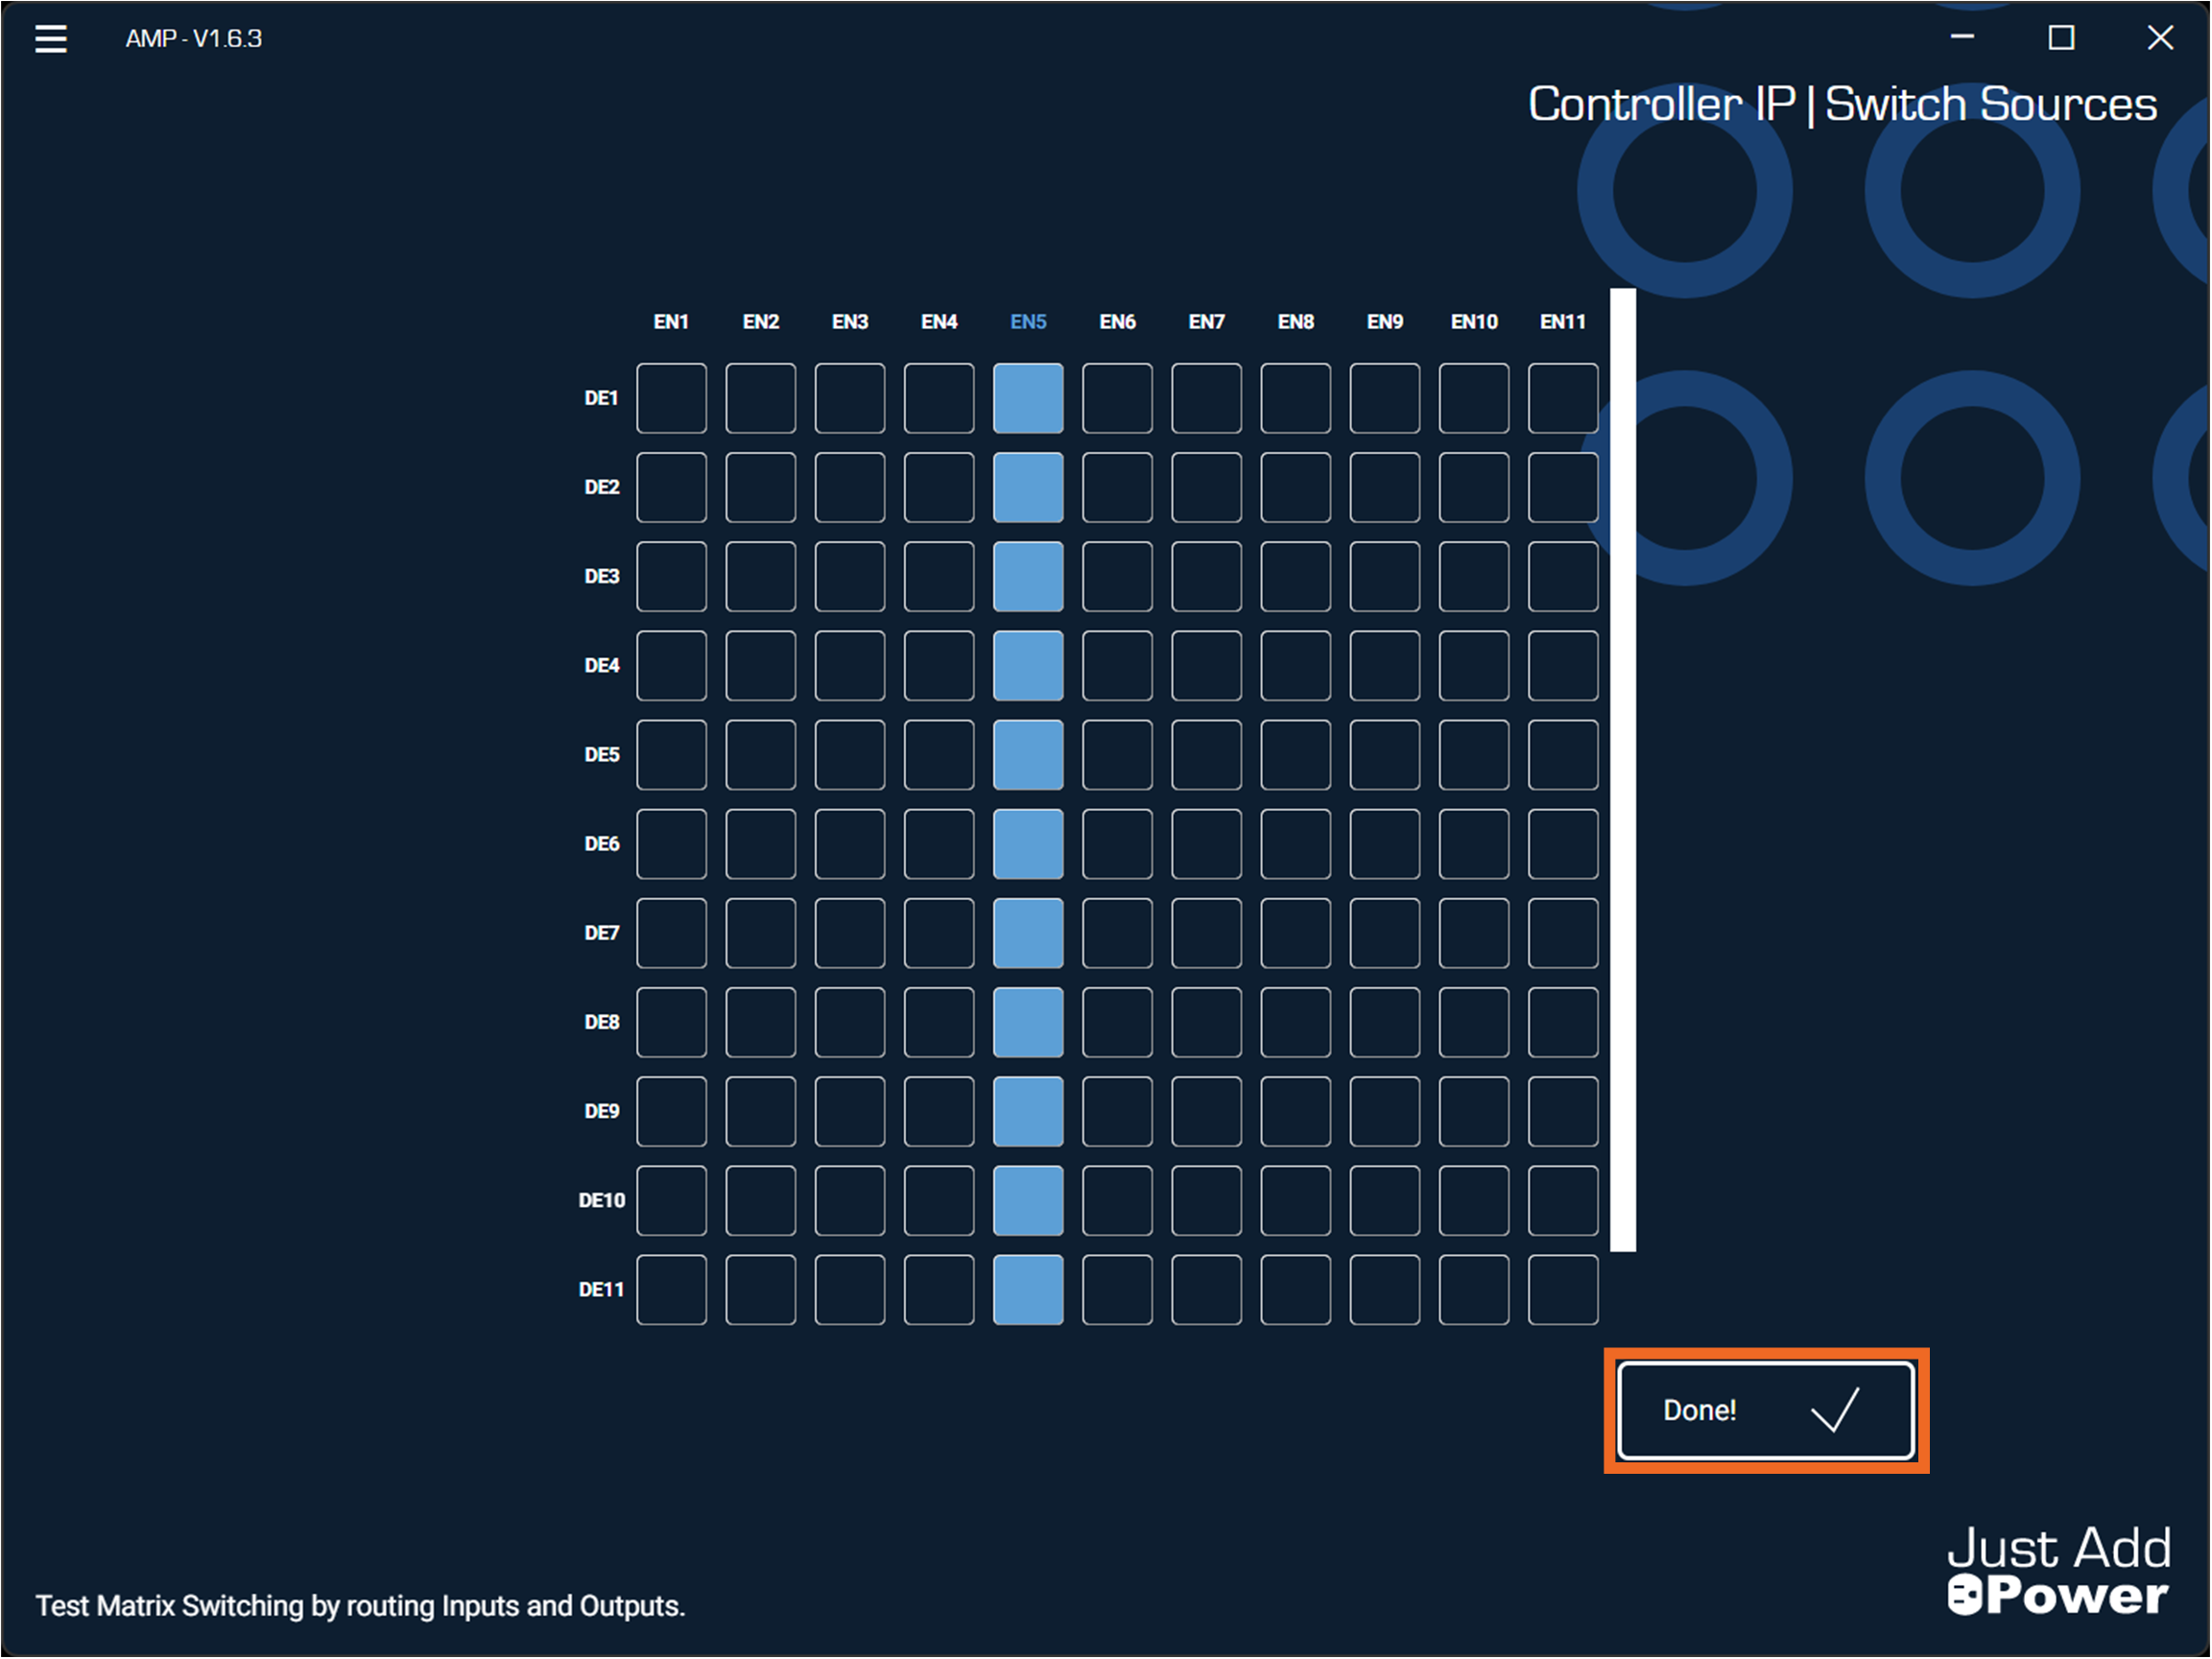
After connecting, AMP generates a Switching Grid. The columns represent Encoder Numbers (Inputs), and the rows represent Decoder Numbers (Outputs).
-
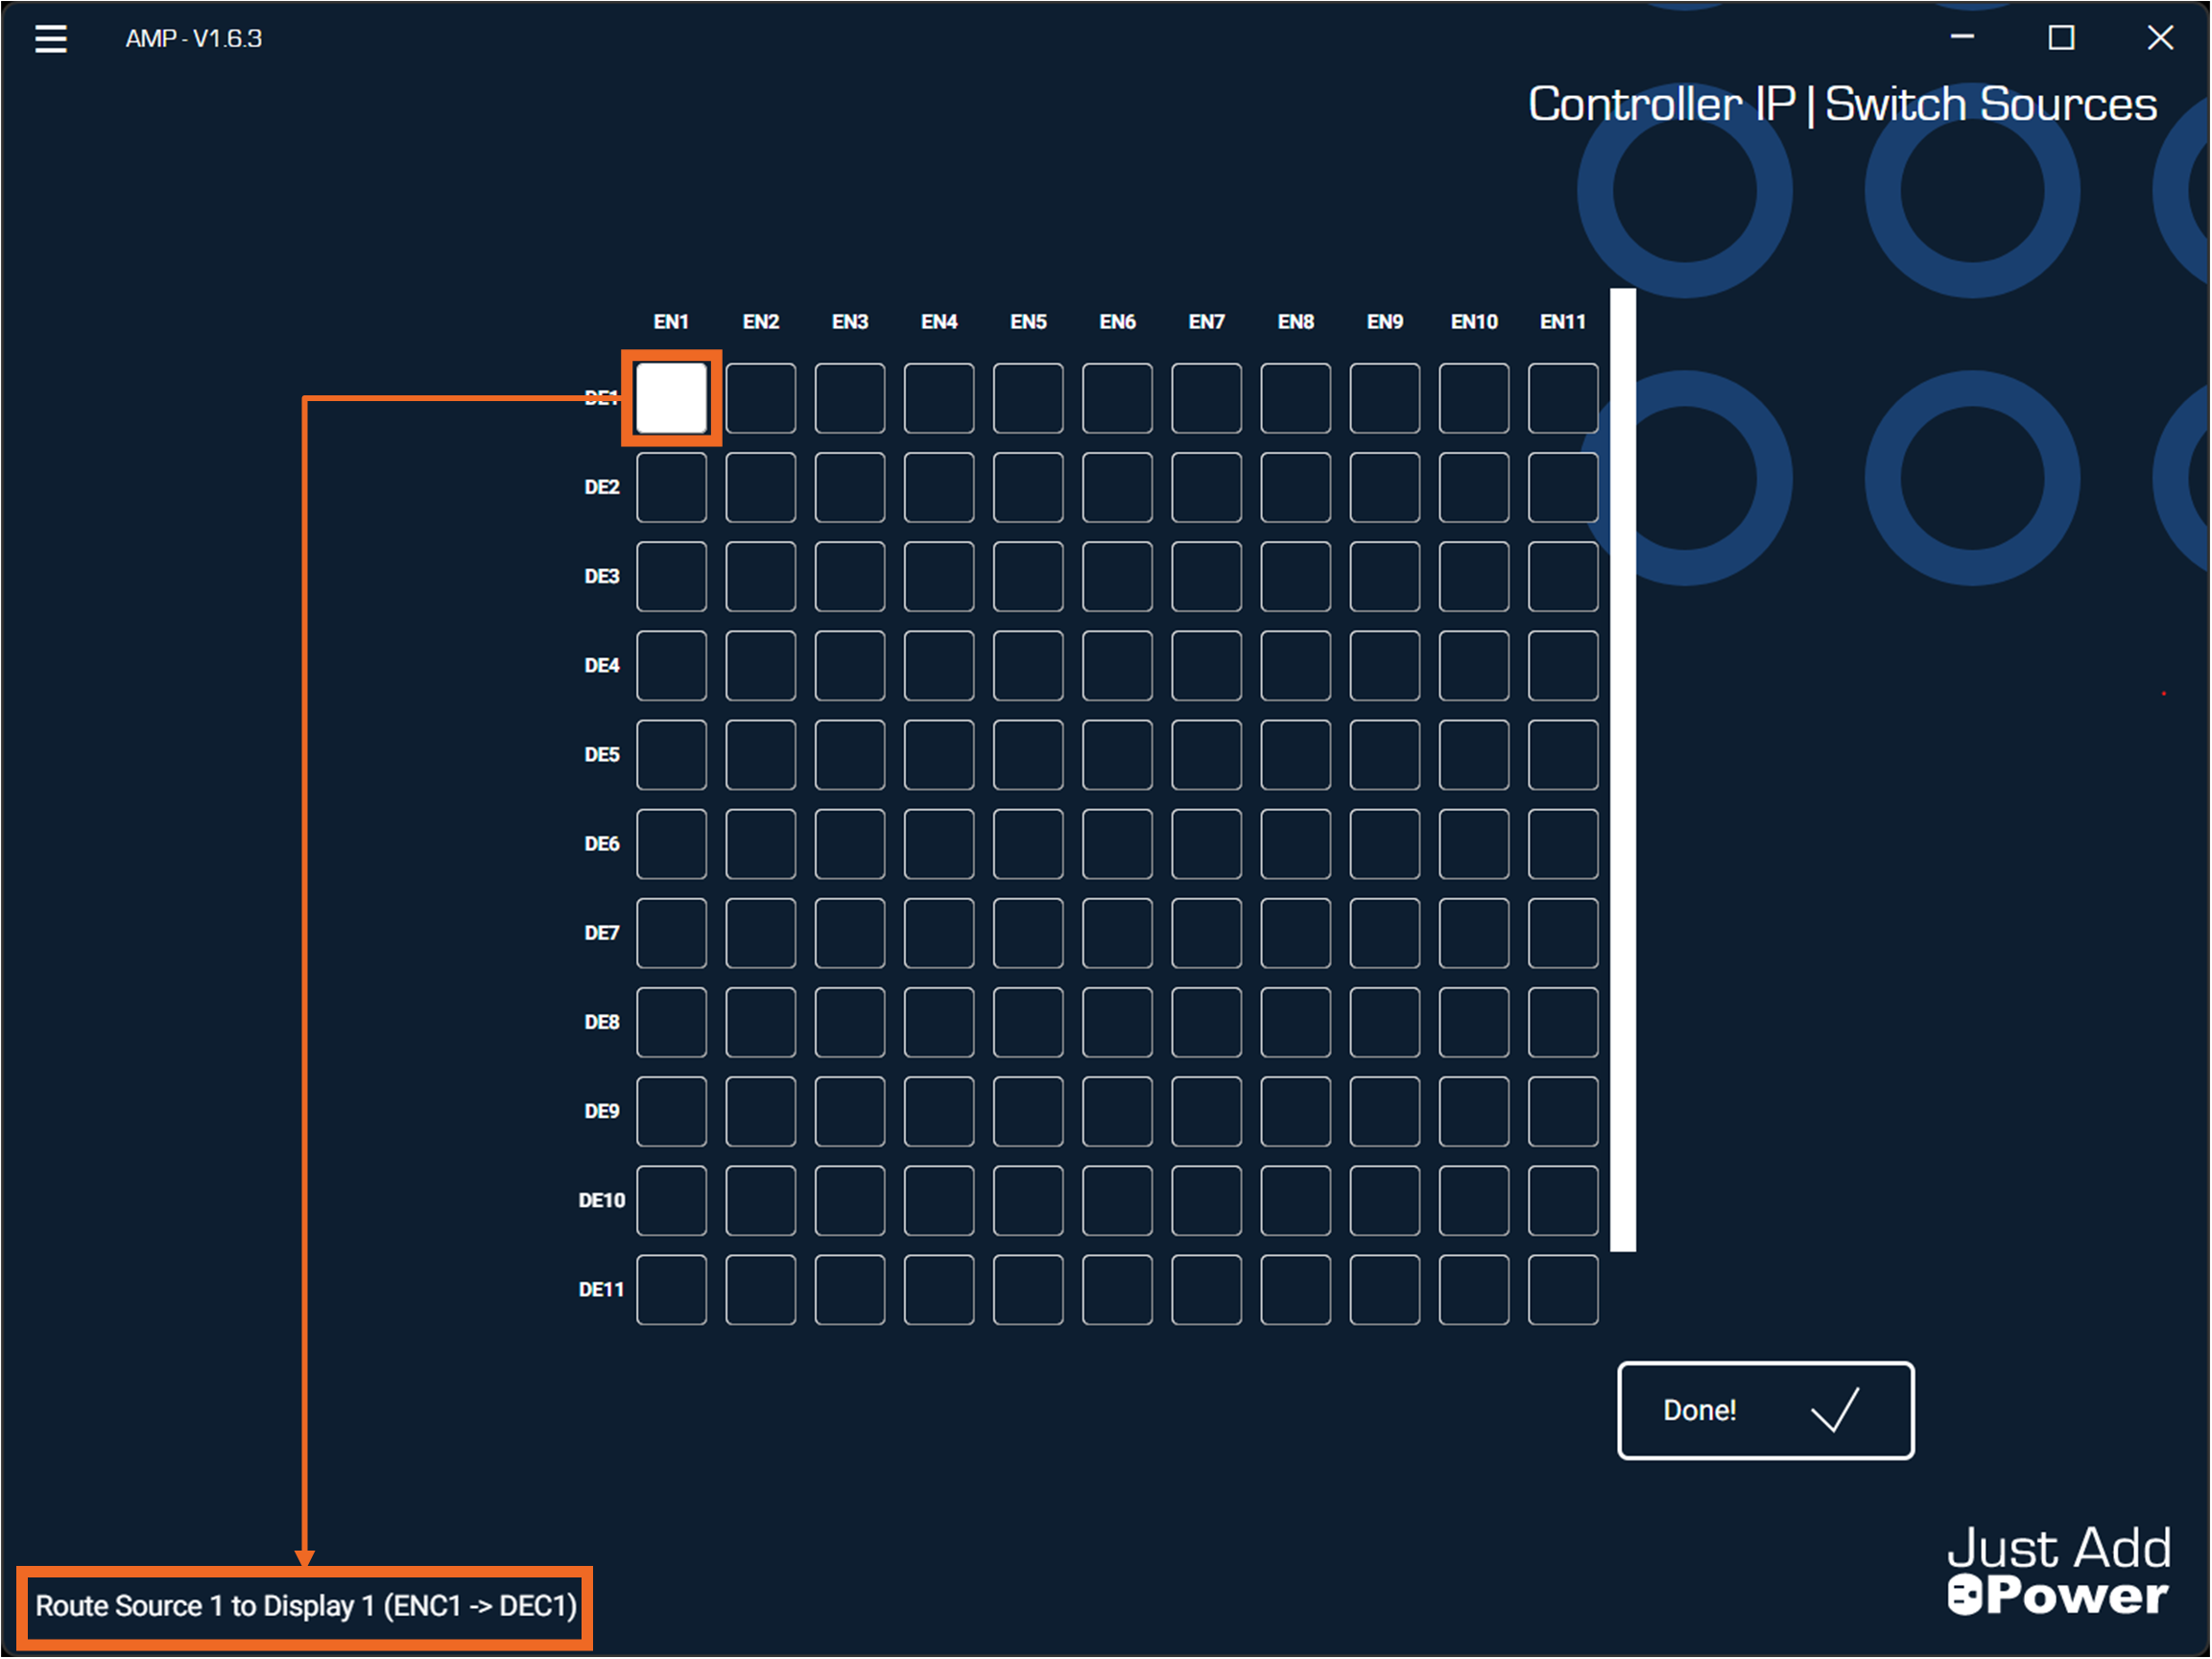
Hover the mouse pointer over any selection box to preview the switch operation. A description of the selected switch is displayed in the lower-left corner of the AMP window, and the selected box is highlighted in white.
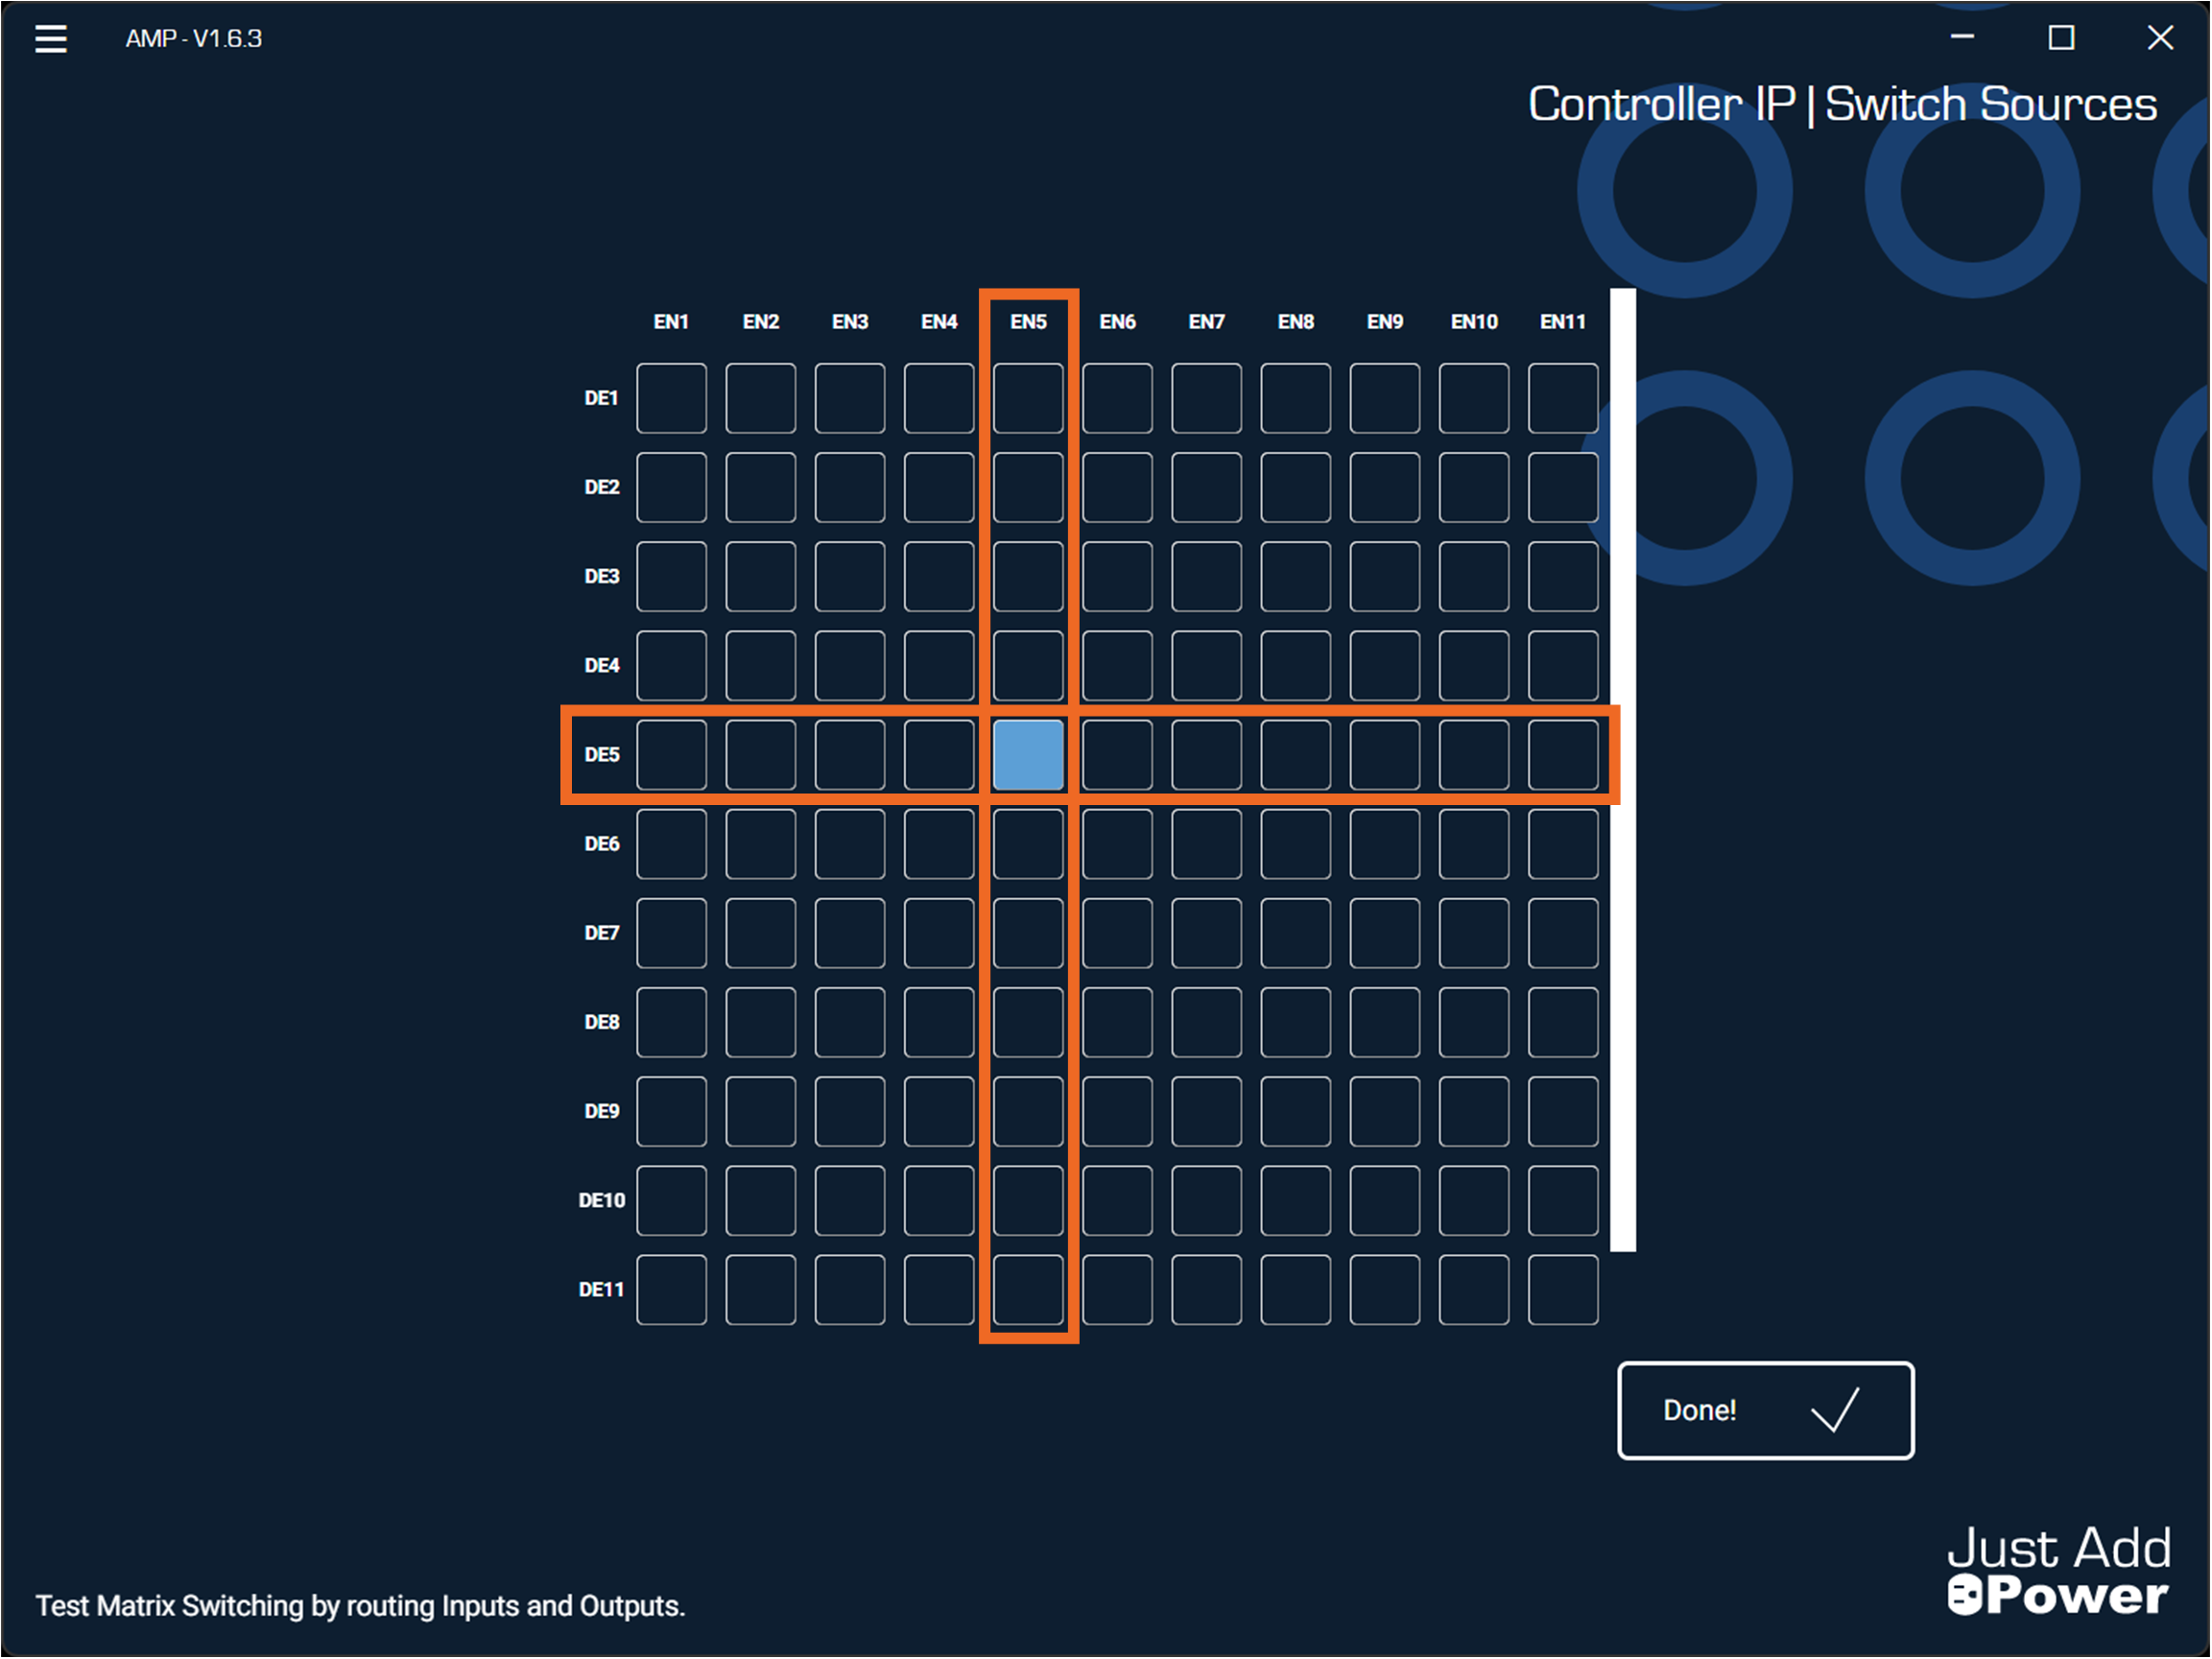
After a switch is performed, the selected box turns blue to indicate the current routing. The blue selection remains until the Decoder is switched to a different Encoder.
Note: The Switching Grid is not a live status view. It reflects only the switch operations performed within the current AMP session. If a Decoder is switched using a control system, webUI, API, or another method, the grid is not automatically updated to reflect those changes.
Performing a Switch
-
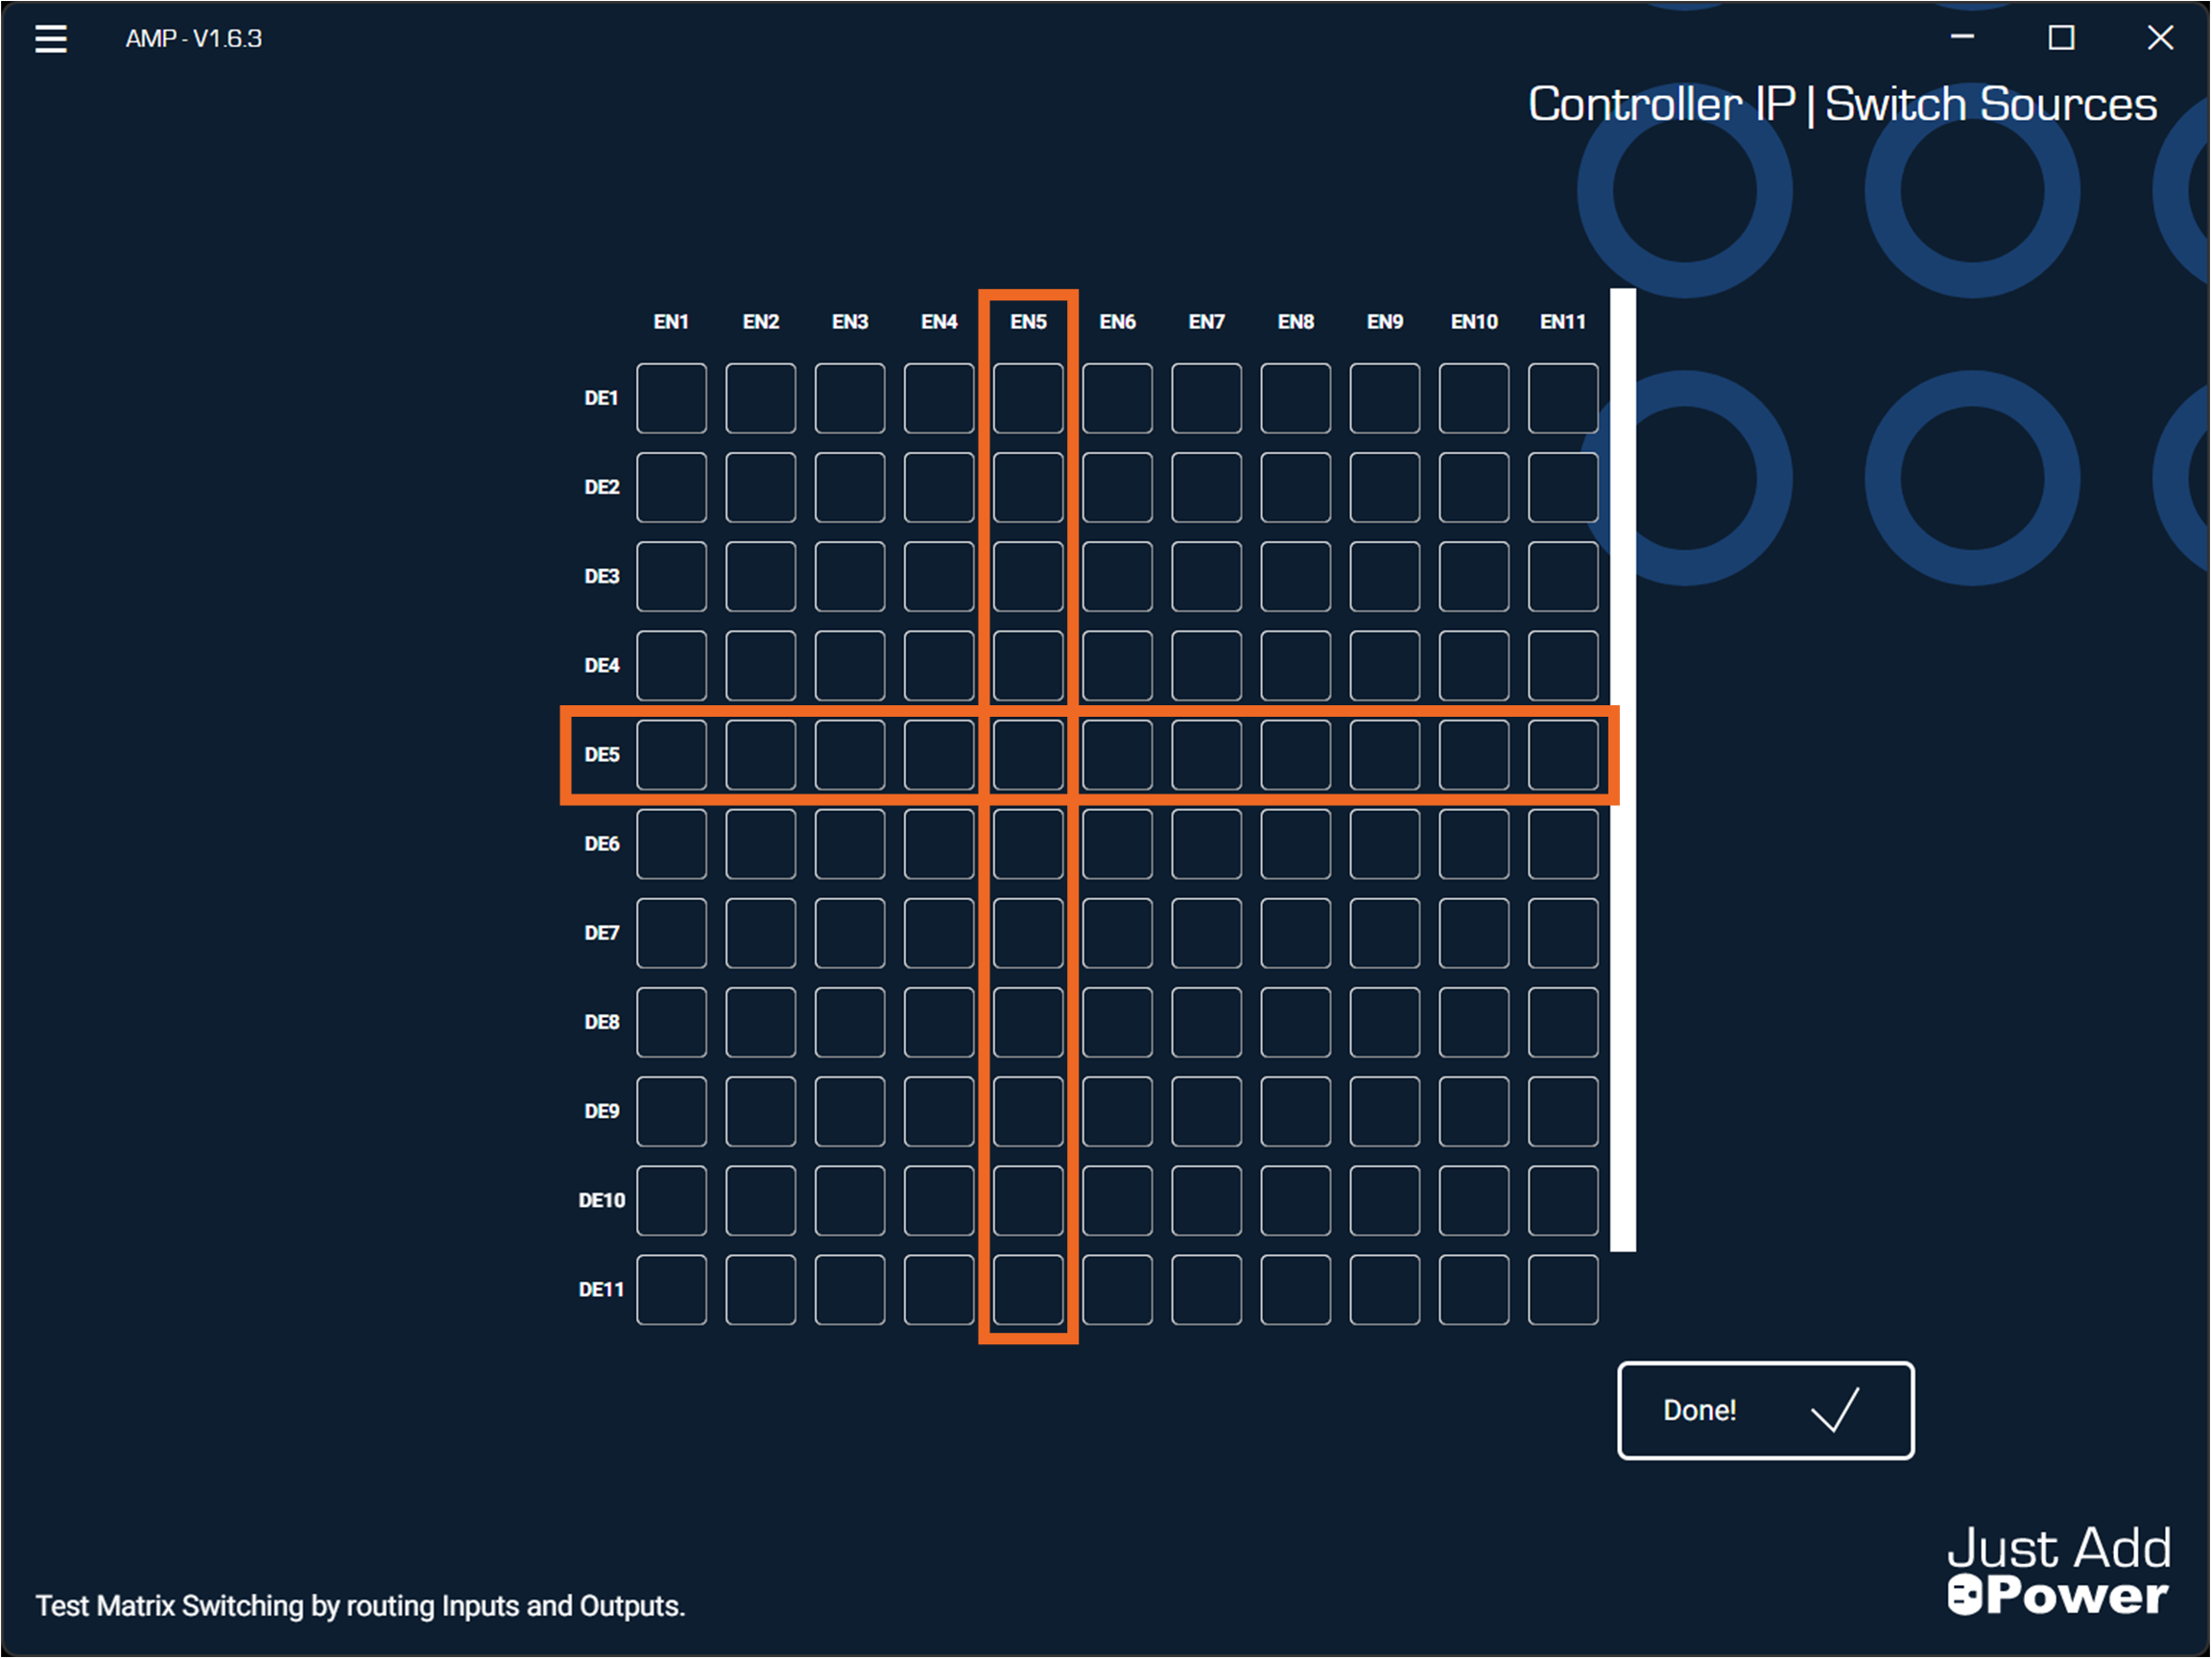
Locate the desired Encoder (Input) column and Decoder (Output) row.
-
Click the selection box where the Encoder column and Decoder row intersect to switch the selected Decoder to the selected Encoder.
-
To switch all Decoders to the same source, click the desired Encoder (Input) column heading. All Decoders in the system switch to that Encoder.
-
Verify the expected video and audio are present at the selected display, or at all displays when performing a batch switch.
-
Click Done! to close the Switching Sources tool.